Lab#SB08-5: Test API Rest
Spring Boot Restaurant Management
📘 Spring Boot Lab#SB00-5: Test API Rest
There are several effective methods exist to validate API endpoints: from simple bash scripts that log responses to sophisticated testing frameworks like JUnit and RestAssured
Developers have a variety of tools at their disposal. Additionally, Postman provides a user-friendly interface for manual testing, while Mockito enables unit testing with mocked dependencies.
1 Testing API Rest
There are four relevant methods to test a REST API in Spring Boot:
1.1 Bash Script with cURL
Create a bash script to send requests and log responses:
#!/bin/bash

# Send GET request and save response
curl -X GET http://localhost:8080/api/endpoint > response.json

# Log the response
echo "API Response:" >> log.txt
cat response.json >> log.txt
echo "" >> log.txt

# Check for errors
if grep -q "error" response.json; then
    echo "Error detected in API response" >> log.txt
else
    echo "API request successful" >> log.txt
fi
1.2 Postman
Use Postman to send requests and validate responses:
- Create a new request in
Postman - Set the
HTTPmethod andURL - Add headers and request body if needed
- Send the request and examine the response
- Write tests in the “Tests” tab using
JavaScript:
1.3 JUnit and RestAssured
Test the @RestController class using JUnit and RestAssured:
@SpringBootTest(webEnvironment =
    SpringBootTest.WebEnvironment.RANDOM_PORT)
public class ApiControllerTest {

    @LocalServerPort
    private int port;

    @Test
    public void testGetEndpoint() {
        RestAssured.given()
            .port(port)
            .when()
            .get("/api/endpoint")
            .then()
            .statusCode(200)
            .body("key", equalTo("expected_value"));
    }
}
1.4 Mockito
Use Mockito to test controller methods with mocked dependencies:
@ExtendWith(MockitoExtension.class)
public class ApiControllerTest {

    @Mock
    private SomeService someService;

    @InjectMocks
    private ApiController apiController;

    @Test
    public void testGetEndpoint() {
        when(someService.getData()).thenReturn("mocked_data");

        ResponseEntity<String> response = apiController.getEndpoint();

        assertEquals(HttpStatus.OK, response.getStatusCode());
        assertEquals("mocked_data", response.getBody());
        verify(someService).getData();
    }
}
2 Configure local H2 server
Running a local H2 server instance for testing REST APIs provides a more realistic environment that closely simulates production conditions.
This setup allows for accurate testing results, as it retains data between test runs, unlike in-memory databases. The local server supports multiple connections, which is essential for testing concurrent API requests effectively.
Moreover, having a local server enables realistic performance benchmarking for database interactions and provides debugging tools like the H2 Console.
This console allows easy inspection of the database state during tests, which is invaluable for troubleshooting. Additionally, testing advanced features such as transactions and concurrency is more effective in a server-mode database.
albert@albert-VirtualBox:~/MyApps$ java -cp h2-*.jar org.h2.tools.Server -tcp -tcpAllowOthers -tcpPort 8082
TCP server running at tcp://127.0.1.1:8082 (others can connect)
And adding flags to publish the web console:
albert@albert-VirtualBox:~/MyApps$ java -cp h2-*.jar org.h2.tools.Server -tcp -tcpAllowOthers -tcpPort 80 -web -webAllowOthers -webPort 8080
TCP server running at tcp://127.0.1.1:8082 (others can connect)
Web Console server running at http://127.0.1.1:8080 (others can connect)
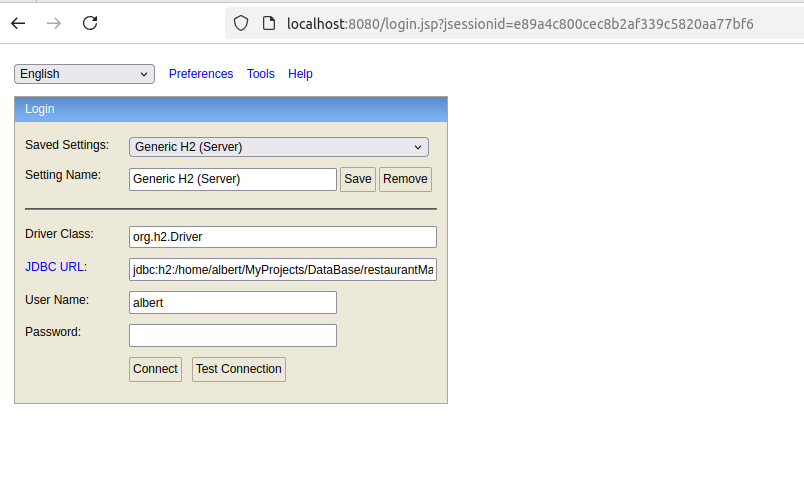
Once it is running the web console pops up:
To run the H2 database in server mode and allow multiple connections at 8082 server port, you can use the following command:
Let’s break down this command and explain its components:
java: Invokes theJavaruntime.-cp h2-*.jar: Specifies the classpath, including theH2 databaseJAR file.org.h2.tools.Server: The main class to start theH2 server.-tcp: Starts theTCPserver.-tcpAllowOthers: Allows other computers to connect to theH2 databaseserver. This is important for remote connections.-tcpPort 8082: Specifies the TCP port on which the server will listen. In this case, it’s set to 8082.
After running this command, the H2 database server will start and listen for connections on port 8082. You should see output indicating that the server has started successfully.
To connect to this server from your application, you would use a JDBC URL like this:
2.1 Downloads
Download latest version or add to pom.xml:
<dependency>
    <groupId>com.h2database</groupId>
    <artifactId>h2</artifactId>
    <version>2.3.232</version>
</dependency>
Links
3 Three-ports system
In Spring Boot applications testing with H2 database setups, different ports are used for specific purposes:
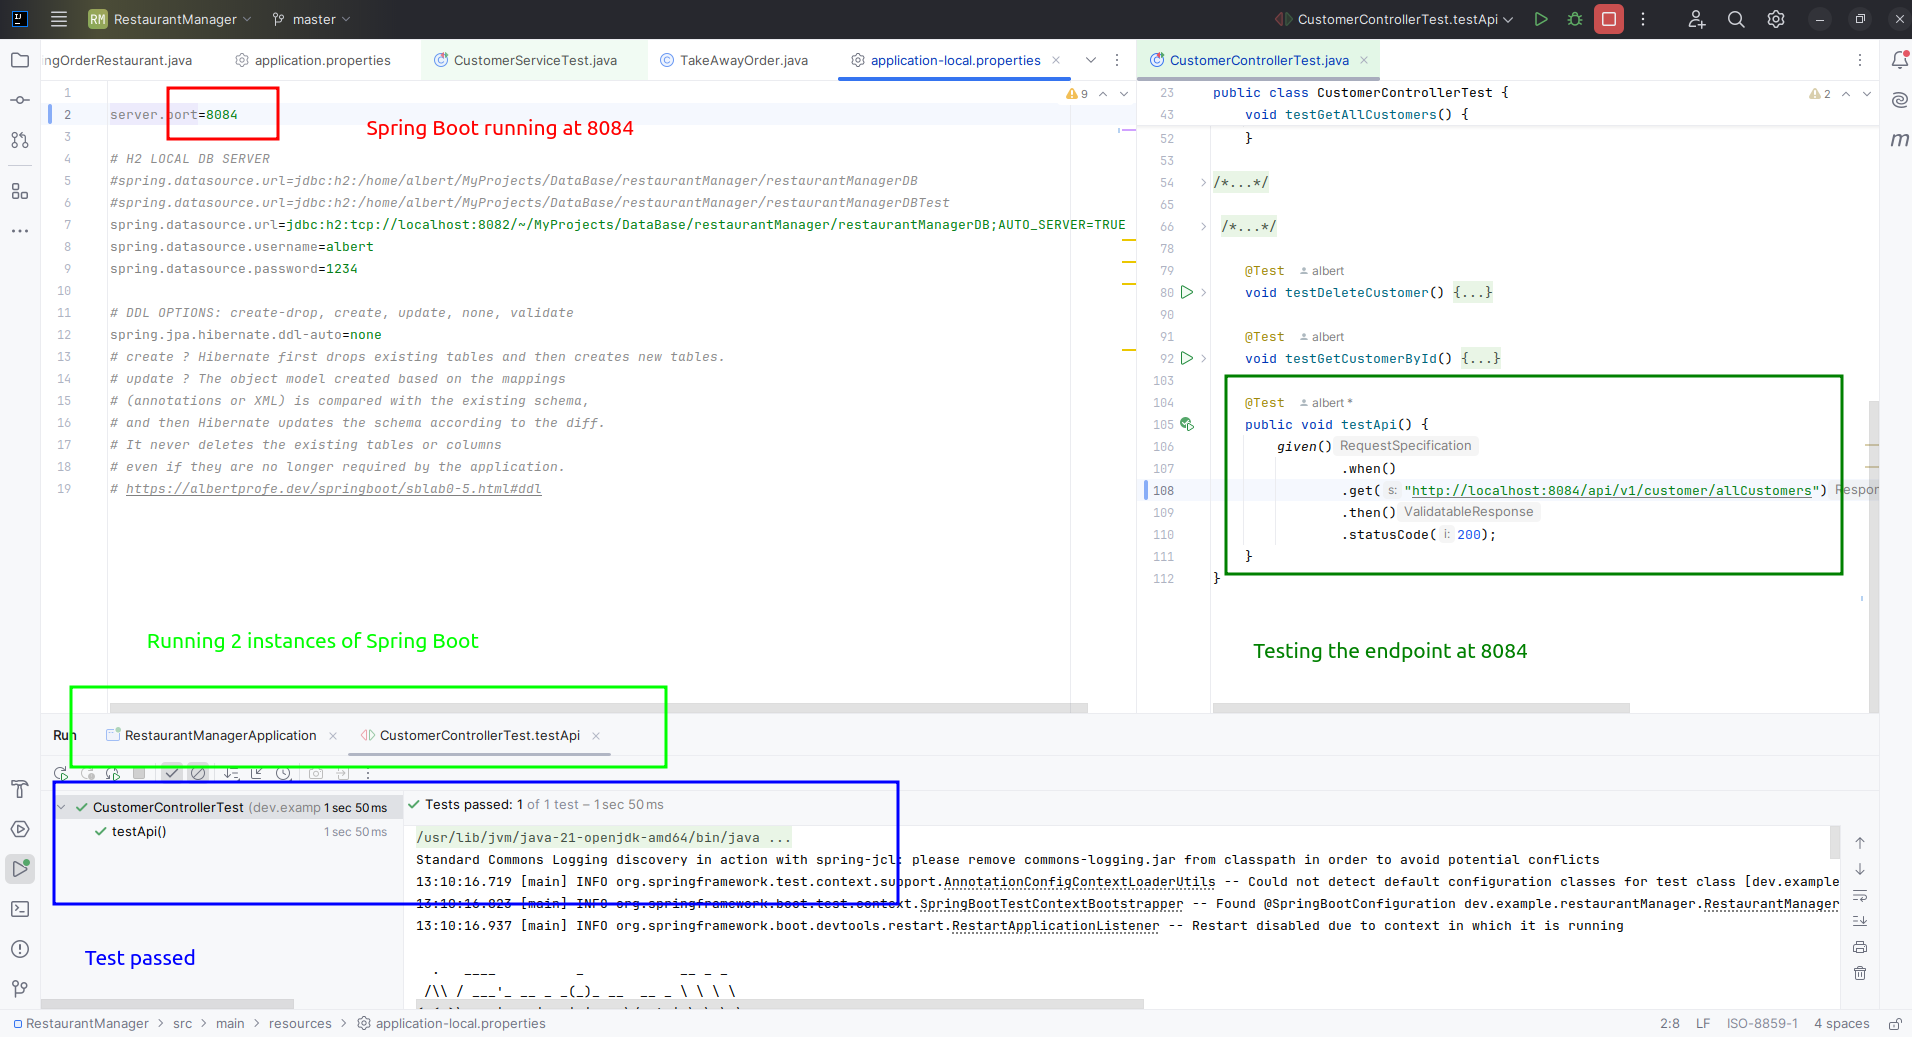
Spring Boot Application (Port 8084): The test uses port
8084for the Spring Boot application. This is a custom port chosen for the test environment, different from the default8080to avoid conflicts with other services, we leave this port, the8080for theh2-console.H2 TCP Server (Port 8082): The H2 database TCP server runs on port
8082. This is the default port for H2’s TCP server and is used for database connections from your application.H2 Web Console (Port 8080): The H2 web console is set to run on port
8080. This provides a web interface to interact with theH2 databasefor management and querying.
Using different ports for these components allows them to run simultaneously without conflicts. The Spring Boot application can connect to the H2 database via the TCP port (8082), while developers can access the H2 console via the web port (8080) for database management.
The application’s API is then tested on its own port (8084), ensuring isolation between the application, database server, and database console.
H2 web console starts at 8080 port
3.1 .lock and .trace
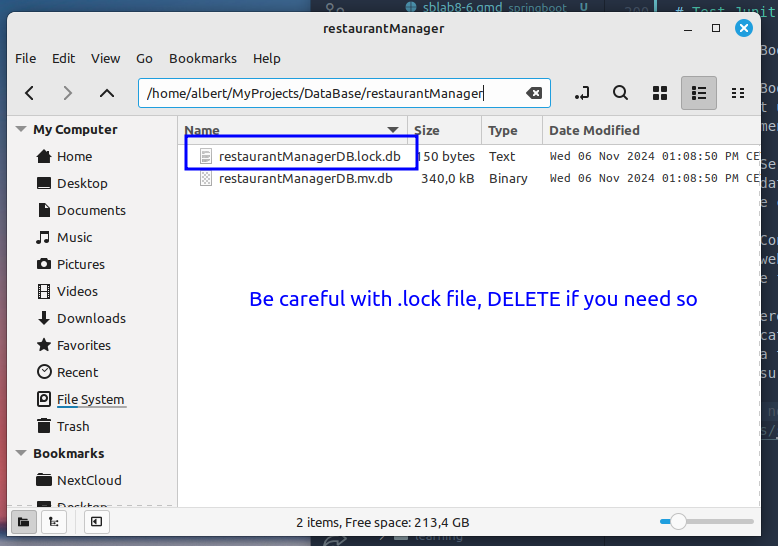
Be careful with the files RestaurantMangerDB creates like
.lockand.trace.
.lock and .trace files are typically used by database systems for management and troubleshooting purposes:
.lock files: - Used to prevent concurrent access to database resources - Indicate that a process has exclusive access to a particular file or resource - Help maintain data integrity by avoiding conflicts between multiple processes
.trace files: - Contain detailed logs of database operations and events - Used for debugging and performance analysis - May include SQL statements, execution plans, and error messages - Helpful for identifying issues like deadlocks or slow queries


