React JS: Create a React project
ReactJS Project
1 Install nvm: Node Version Manager
nvm is a version manager for node.js, designed to be installed per-user, and invoked per-shell.
nvm works on any POSIX-compliant shell (sh, dash, ksh, zsh, bash), in particular on these platforms: unix, macOS, and windows WSL.
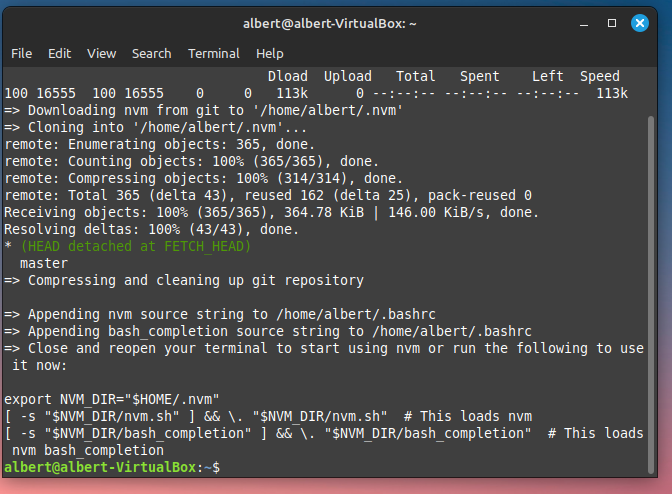
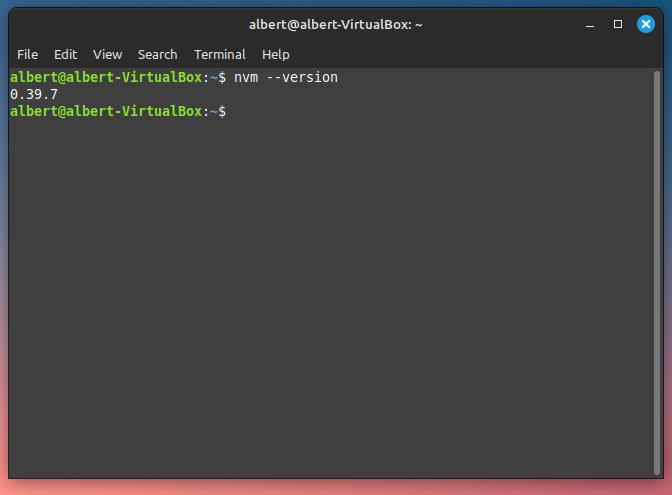
To install or update nvm, you should run the install script. To do that, you may either download and run the script manually, or use the following cURL command:
curl -o- https://raw.githubusercontent.com/nvm-sh/nvm/v0.39.7/install.sh | bash
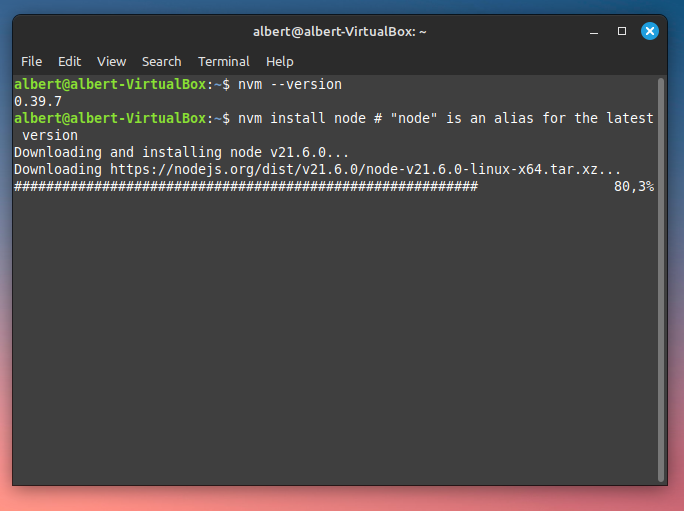
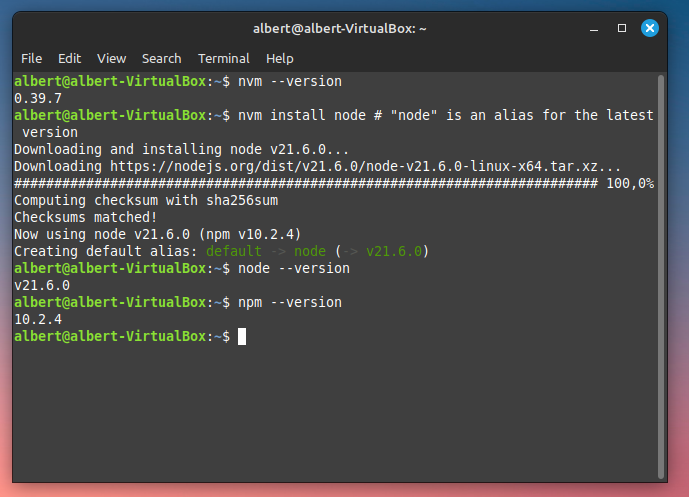
nvm install node # "node" is an alias for the latest version
2 ReactJS Starting
2.1 React Directly in HTML
Start by including three scripts, the first two let us write React code in our JavaScripts, and the third, Babel, allows us to write JSX syntax and ES6 in older browsers.
<!DOCTYPE html>
<html>
  <head>
    <script src="https://unpkg.com/react@18/umd/react.development.js" crossorigin></script>
    <script src="https://unpkg.com/react-dom@18/umd/react-dom.development.js" crossorigin>
    </script>
    <script src="https://unpkg.com/@babel/standalone/babel.min.js"></script>
  </head>
  <body>

    <div id="mydiv"></div>

    <script type="text/babel">
      function Hello() {
        return <h1>Hello World!</h1>;
      }

      ReactDOM.render(<Hello />, document.getElementById('mydiv'))
    </script>

  </body>
</html>
2.2 Install Nodejs and npm
To create a new React app, you will need to have the following software installed on your computer:
Node.js: This is a JavaScript runtime that is used to execute JavaScript code outside of a web browser. You can download the latest version ofNode.jsfrom the official website (https://nodejs.org/) or through a package manager like Homebrew (Mac) or Chocolatey (Windows).npm: This is the package manager forNode.js, which is used to manage the libraries and dependencies that your app uses. npm is included withNode.js, so you don’t need to install it separately.
npx is a tool that is included with npm, the package manager for Node.js. It allows you to execute packages that are installed locally or globally in your project’s node_modules directory.
2.3 create-react-app
Whether you’re using React or another library, Create React App lets you focus on code, not build tools.
To create a project called my-app, run this command:
2.4 Install create-react-app
Updating your build tooling is typically a daunting and time-consuming task. When new versions of Create React App are released, you can upgrade using a single command:
2.5 React Developer Tools
Use React Developer Tools to inspect React components, edit props and state, and identify performance problems.
For other browsers (for example, Safari), install the react-devtools npm package:
2.6 Tree-folder
The React application automatically creates the basic tree-folder, as follows:
.gitignore: this file is the standard file which is used by source control tool git to identify which files and folders are need to be ignored while committing the code. Until and unless this file exists, the create-react-app command will not create a git repo in this folder.package.json: this file contains dependencies and scripts required for the project.name- points to name of your app.version- refers to the current version that the application is using.private: true - is a foolproof setting which avoids accidentally publishing of your react app as a public package in npm ecosystem.dependencieswill contain all required node modules and versions required for the application. By default, 2 dependencies are added which include React and React-Dom that allow using JavaScript. In our demo, we are using React version 16.8.Scriptsspecify aliases that can be used to access some React command in a more efficient manner.
package-lock.jsoncontain exact dependency tree to be installed in /node_modules. It helps while a team is working on private apps to ensure that they are working on the same version of dependencies and sub-dependencies. It also maintains a history of changes done in package.json so, that at any point of time, when required previous changes can be looked back in the package-lock.json file.node_modules- This folder contains all dependencies and sub-dependencies specified in package.json used by React app. It contains more than 800 subfolders, this folder is automatically added in the .gitignore file.public- This folder contains files which don’t require additional processing by webpack. The index.html file is considered as an entry point for the web application. Here, the favicon is a header icon and manifest.xml file contains configuration when your application is used for Android app.src- This folder is the heart of React application as it contains JavaScript which needs to be processed by webpack. In this folder, there is a main component App.js, its related styles (App.css), test suite (App.test.js). index.js, and its style (index.css); which provide an entry point into the App. Lastly, it contains registerServiceWorker.js which takes care of caching and updating files for the end user. It helps in offline capability and faster page loading after the first visit.
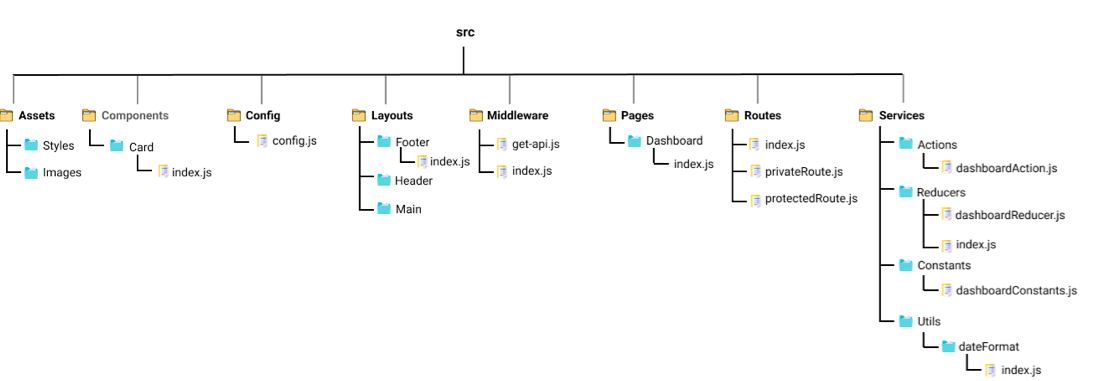
2.7 ReactJs Project Structure
The folder structure looks like this.
Assets: As the name says, it contains assets of our project. It consists of images and styling files. Here we can store our global styles. We are centralizing the project so we can store the page-based or component-based styles over here. But we can even keep style according to the pages folder or component folder also. But that depends on developer comfortability.Layouts: As the name says, it contains layouts available to the whole project like header, footer, etc. We can store the header, footer, or sidebar code here and call it.Components: Components are the building blocks of any react project. This folder consists of a collection of UI components like buttons, modals, inputs, loader, etc., that can be used across various files in the project. Each component should consist of a test file to do a unit test as it will be widely used in the project.Pages: The files in the pages folder indicate the route of the react application. Each file in this folder contains its route. A page can contain its subfolder. Each page has its state and is usually used to call an async operation. It usually consists of various components grouped.Middleware: This folder consists of middleware that allows for side effects in the application. It is used when we are using redux with it. Here we keep all our custom middleware.Routes: This folder consists of all routes of the application. It consists of private, protected, and all types of routes. Here we can even call our sub-route.Config: This folder consists of a configuration file where we store environment variables in config.js. We will use this file to set up multi-environment configurations in your application.Services: This folder will be added if we use redux in your project. Inside it, there are 3 folders named actions, reducers, and constant subfolders to manage states. The actions and reducers will be called in almost all the pages, so create actions, reducers & constants according to pages name.Utils: Utils folder consists of some repeatedly used functions that are commonly used in the project. It should contain only common js functions & objects like dropdown options, regex condition, data formatting, etc.
2.8 Debugging ReactJS
There there are several steps you can take to make the debugging process easier:
Check the Console: Open the browser’s console and look for any error messages. Often, errors will be logged in the console, which will give you an idea of where to start debugging. You can learn more about using the browser console to debug JavaScript here:
[MDN Web Docs - Console](https://developer.mozilla.org/en-US/docs/Web/API/Console)Use React Developer Tools: React Developer Tools is a browser extension that provides a suite of tools for debugging and profiling React components. It allows you to inspect React component hierarchies and track the flow of data between components. You can learn more about using React Developer Tools here:
[React Developer Tools](https://github.com/facebook/react-devtools)Use Console.log(): Place
console.log()statements throughout your code to print out variables and see how they change as the code executes. You can learn more about usingconsole.log()for debugging here:[MDN Web Docs - Debugging JavaScript](https://developer.mozilla.org/en-US/docs/Web/javascript/Reference/Statements/console)Breakpoints: Set breakpoints in your code using the browser’s developer tools or an integrated development environment (IDE) like Visual Studio Code. This allows you to pause the execution of your code and step through it line by line, inspecting variables and the state of your components. You can learn more about using breakpoints for debugging here:
[Chrome DevTools - Debugging JavaScript](https://developers.google.com/web/tools/chrome-devtools/javascript)

