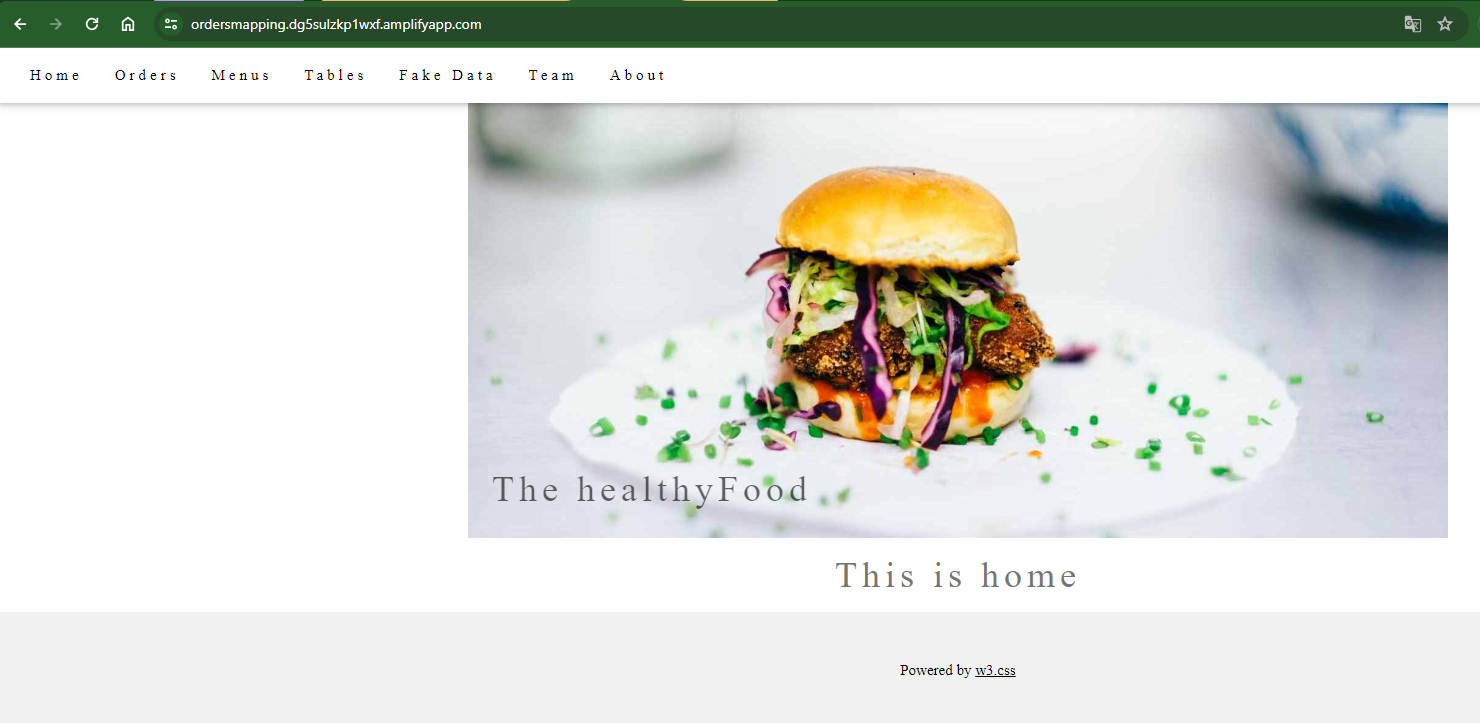
Lab#RE06-1: healthyFood Restaurant
ReactJS labs
📘 React JS Lab#RE06-1: healthyFood Restaurant
In this lab, we will be using:
- the
create-react-appwith npx - w3.css framework for css
- install css on React:
npm install w3-css - w3 css:
cards,button,container
- install css on React:
- JSX components
- array of
JSON: data as model
This React project serves as the front-end for a robust Spring Boot back-end, complemented by a well-designed UML. The UML is meticulously crafted in the context of Lab#SE04-1, ensuring a structured foundation for the restaurant management system.
Project Overview
- Technology Stack:
- Front-End: React
- Back-End: Spring Boot
- System Design:
- The UML diagram, designed as part of Lab#SE04-1, lays the groundwork for essential entities such as Orders, Tables, and Menus.
Integration with Spring Boot with API Rest
This React front-end seamlessly integrates with the Spring Boot back-end via API Rest, creating a efficient restaurant management.
The UML design acts as a guide, ensuring a cohesive flow between the front-end and back-end components.
1 General approach
To craft the React front end for our restaurant management system, we begin by comprehending the UML diagram and backend functionalities.
- Initiating a new React project using tools like
Create React Appestablishes the foundational structure. - Component design follows, with entities from the UML diagram mapped to distinct React components, such as Orders, Tables, Menus, and a centralized Controller.
- Connecting to the Spring Boot backend is facilitated through React’s
fetchor similar HTTP libraries.
- Connecting to the Spring Boot backend is facilitated through React’s
Routingis implemented using React Router, establishing distinct paths for functionalities like orders, tables, and menus. State management, accomplished through Redux or React Context API, ensures efficient handling of dynamic data.- UI components are designed and implemented, integrating component libraries for consistency. User input is managed via forms with input validation for an enhanced user experience.
- Unit tests using Jest and React Testing Library validate the correctness of React components.
- Integration with design tools maintains a cohesive look, and responsiveness is prioritized for varying screen sizes.
- Ultimately, the React app is deployed independently using platforms like Netlify or Vercel, ensuring seamless communication with the Spring Boot backend API.
This systematic approach guarantees the development of a scalable and user-friendly front end, aligning with our grand vision for the restaurant management system’s evolution.
2 Install nvm & create-react-app

3 Mock-up
4 Step-by-step code
Reference:
- Your first component
- W3.CSS Tutorial
- npm: W3.CSS is a modern CSS framework with built-in responsiveness
4.1 React functions
4.2 React Application
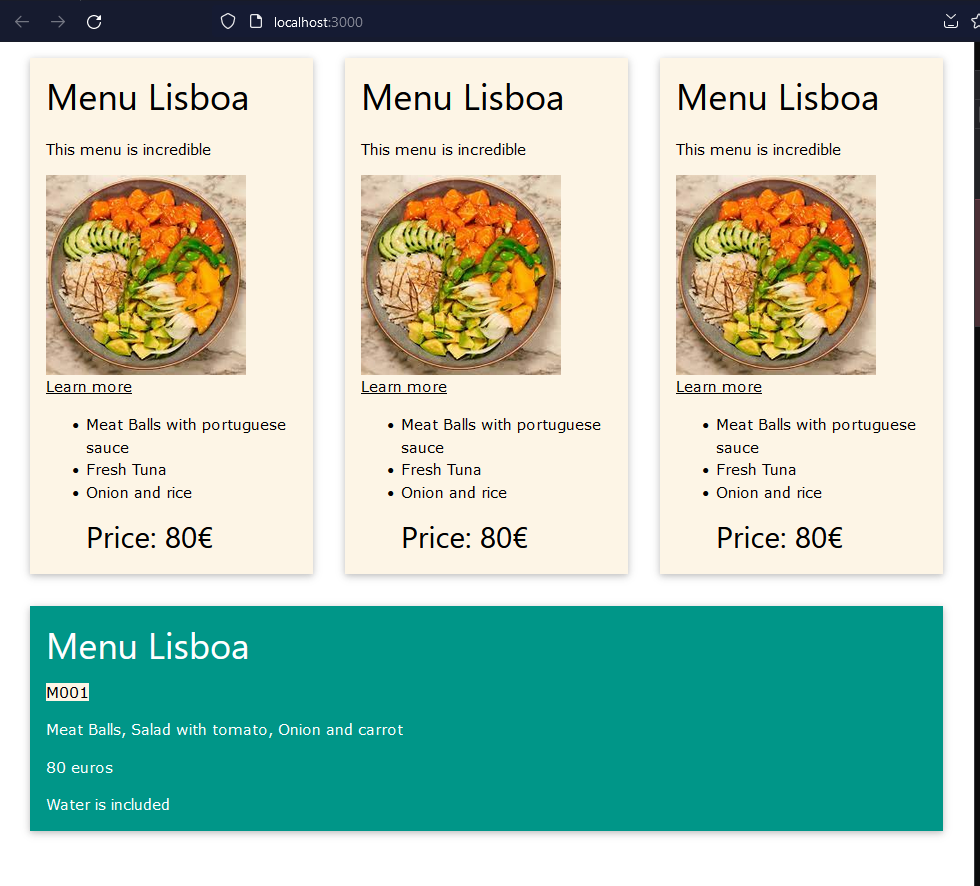
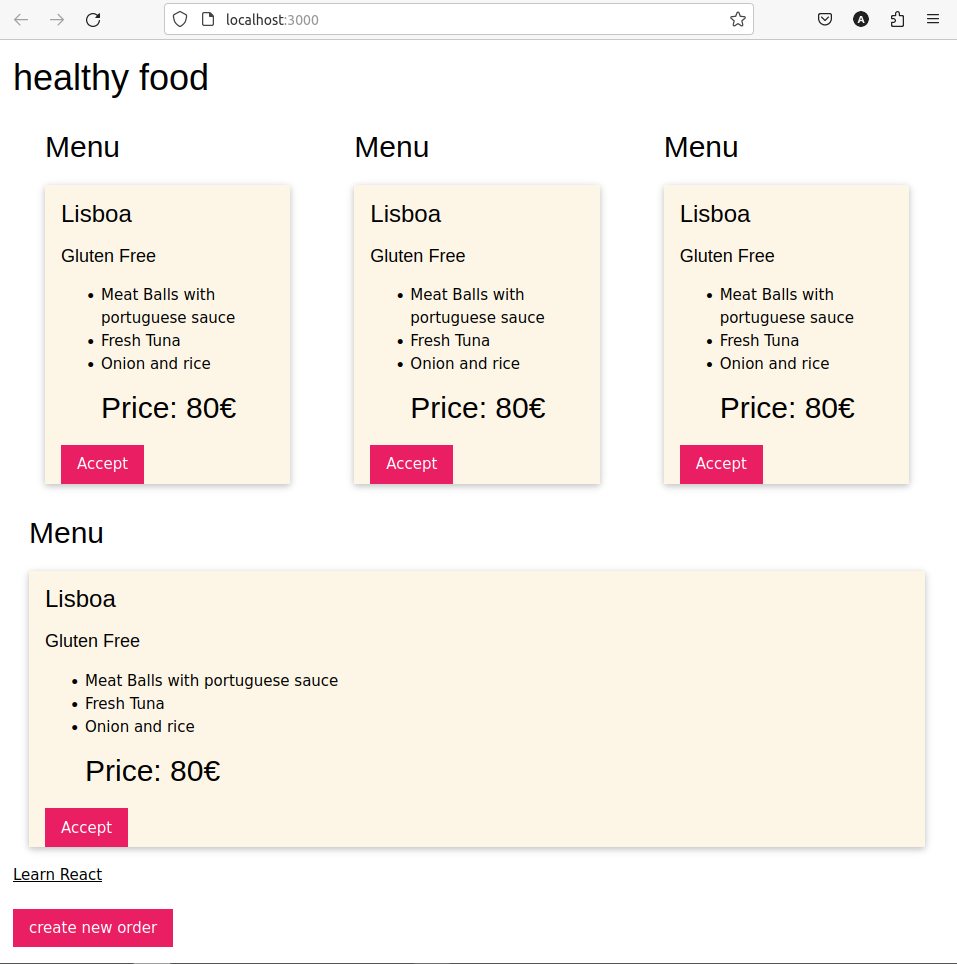
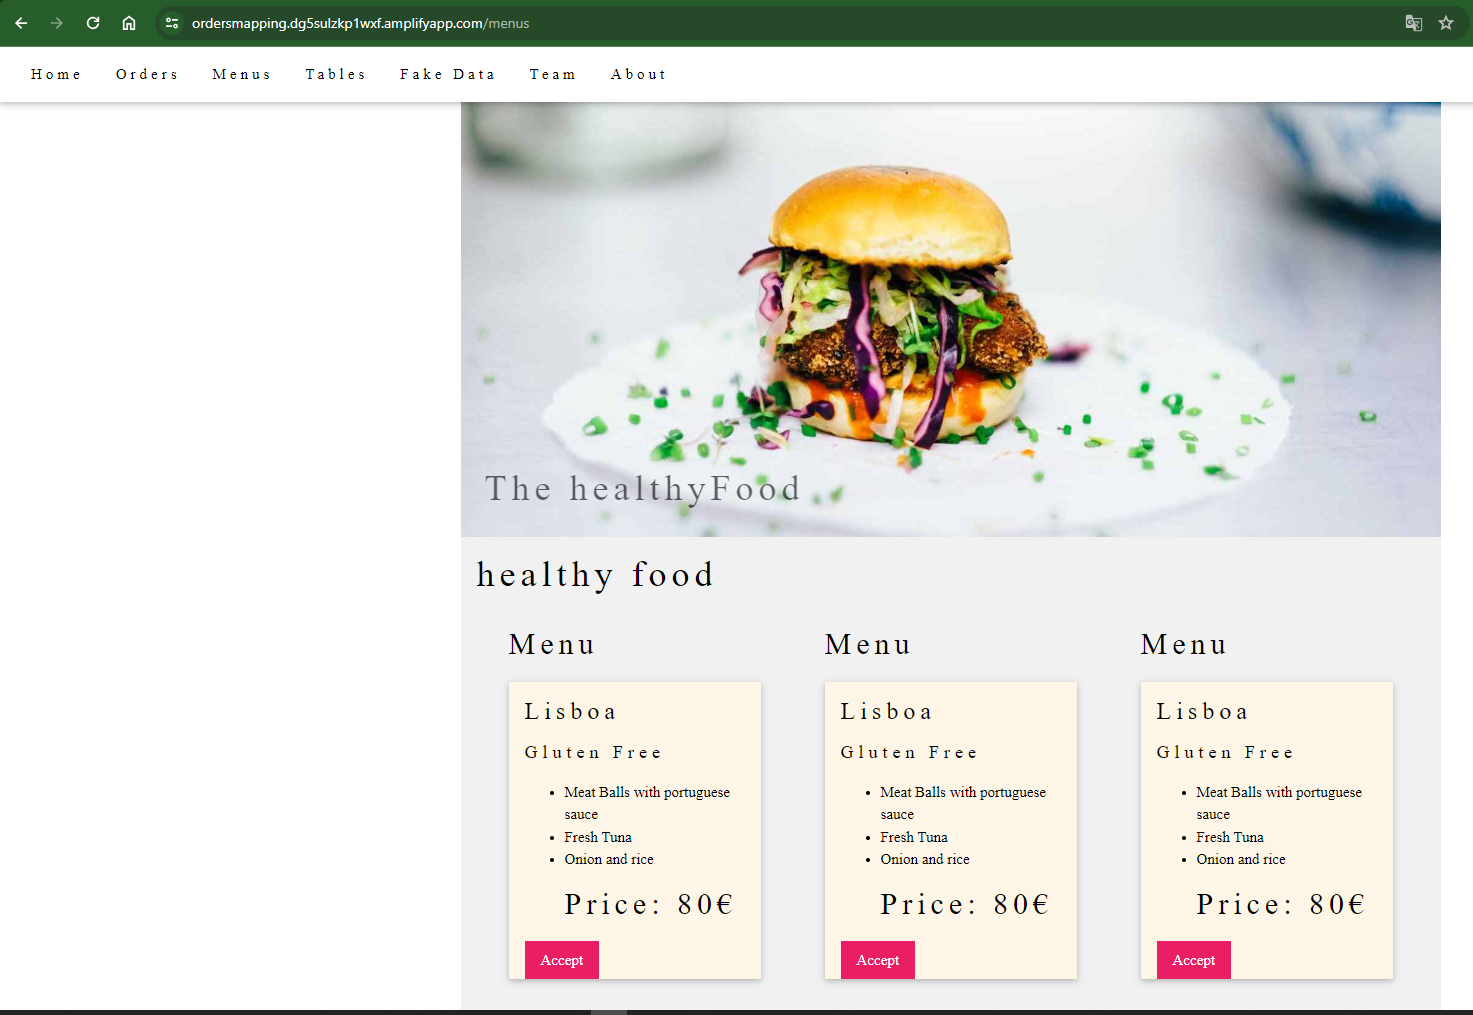
React application is defined with three instances of the MenuList component and one instance of the MenuData component. The application imports external components and a CSS framework (“w3-css/w3.css”).
The App function returns a JSX structure representing the main application. The outermost element is a div with the class “w3-container,” containing three instances of the MenuList component arranged side by side using the “w3-cell” class. Each MenuList component represents a section or module in the application.
The code uses the <> (fragment) syntax to group multiple elements without introducing an additional parent node.
There’s a repetition of the MenuList component, and the application structure isa placeholder.
Depending on the actual requirements, you may want to dynamically render components based on the data or user interactions for a more dynamic and scalable application.
App.jsx
import MenuList from "./MenuList.jsx";
import Order from "./Order.jsx";;
import "w3-css/w3.css";


export default function App() {
  return (
    <>
      <div class="w3-container">
        <h1>healthy food</h1>
        <div class="w3-container w3-cell">
          <MenuList />
        </div>
        <div class="w3-container w3-cell">
          <MenuList />
        </div>
        <div class="w3-container w3-cell">
          <MenuList />
        </div>
        <MenuList />
      </div>
      <div class="w3-container w3-cell">
        <a
          className="App-link"
          href="https://reactjs.org"
          target="_blank"
          rel="noopener noreferrer"
        >
          Learn React
        </a>
      </div>
      <br />
      <Order />
      <br />
    </>
  );
}
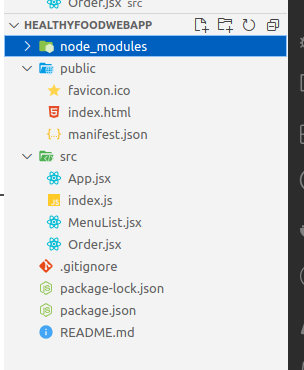
MenuList.jss
import "w3-css/w3.css";
export default function MenuList() {
return (
<>
<div class="w3-container">
<h2>Menu</h2>
<div class="w3-panel w3-card w3-sand">
<h3>Lisboa</h3>
<h5>Gluten Free</h5>
<ul>
<li>Meat Balls with portuguese sauce</li>
<li>Fresh Tuna</li>
<li>Onion and rice</li>
<h2>Price: 80€</h2>
</ul>
<button class="w3-button w3-pink">Accept</button>
</div>
</div>
</>
);
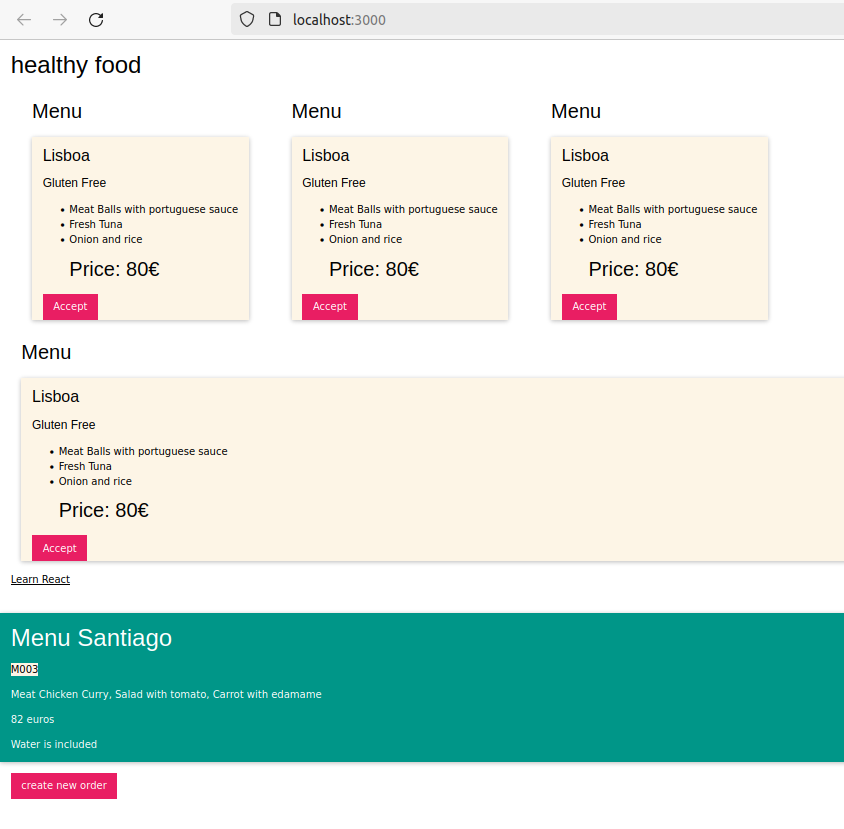
}4.3 Add JSON data as model
A static array named menus represents different restaurant menus, each containing an:
- id,
- name,
- list of contents (foods),
- price,
- and flags indicating whether the menu is
- active and
- includes water.
Data.json
const menus = [
  {
    "id": "M001",
    "name": "Menu Lisboa",
    "contents": [
      "Meat Balls",
      "Salad with tomato",
      "Onion and carrot",
      "Fresh Tuna",
    ],
    "price": 80.0,
    "active": true,
    "water": true
  },
  {
    "id": "M002",
    "name": "Menu New York",
    "contents": [
      "Meat Balls with Pulled Steak",
      "Salad with tomato",
      "Brown Rice",
      "Fresh Salmon"
    ],
    "price": 85.0,
    "active": true,
    "water": true,
  },
  {
    "id": "M003",
    "name": "Menu Santiago",
    "contents": [
      "Meat Chicken Curry",
      "Salad with tomato",
      "Carrot with edamame",
      "Fresh Tuna"
    ],
    "price": 82.0,
    "active": true,
    "water": true,
  }
];
In App we may call the component:
App.jsx
Below the three MenuList components, a MenuData component is rendered with the menu prop set to the first menu item from the menus array (menus[0]).
This implies that the initial data displayed in the MenuData component corresponds to the “Menu Lisboa.”
MenuData.jsx
import "w3-css/w3.css";


export default function MenuData({menu}) {

//console.log(menu);

  return (
    <>

       <div class="w3-panel w3-card w3-teal">
        <h1> {menu.name} </h1>
        <span class="w3-sand">{menu.id}</span>
        <p></p>
        <p>
          {menu.contents[0]},
          {menu.contents[1]},
          {menu.contents[2]}
        </p>

        <p>{menu.price} euros</p>

        <p>Water is {menu.water ? '' : 'not'}
        <span>included </span></p>

      </div>
    </>
  );
}
4.4 Rendering order list
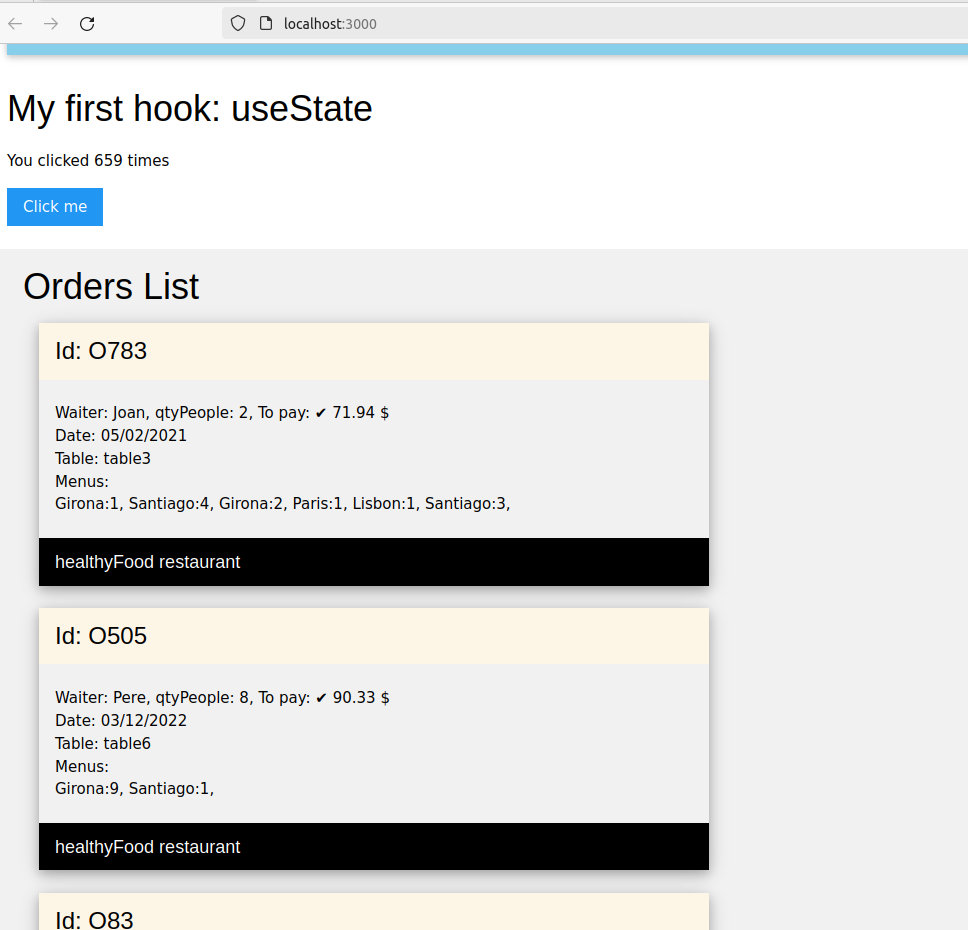
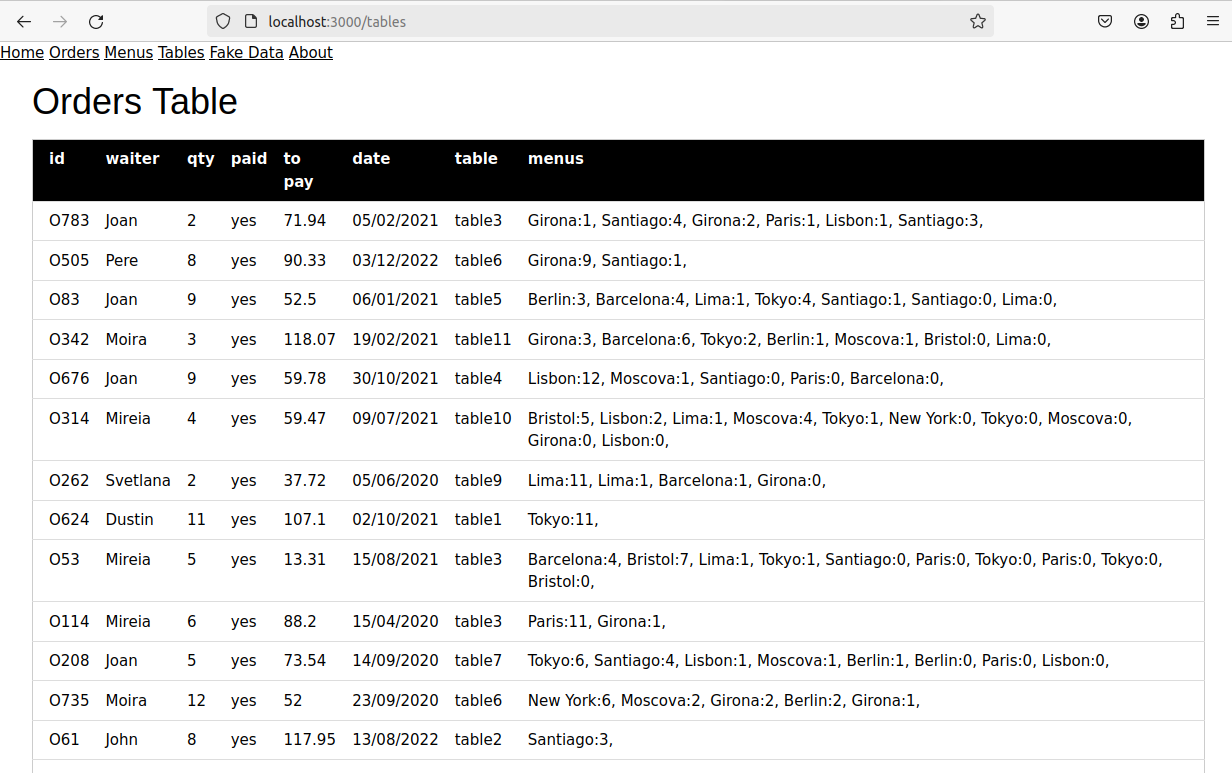
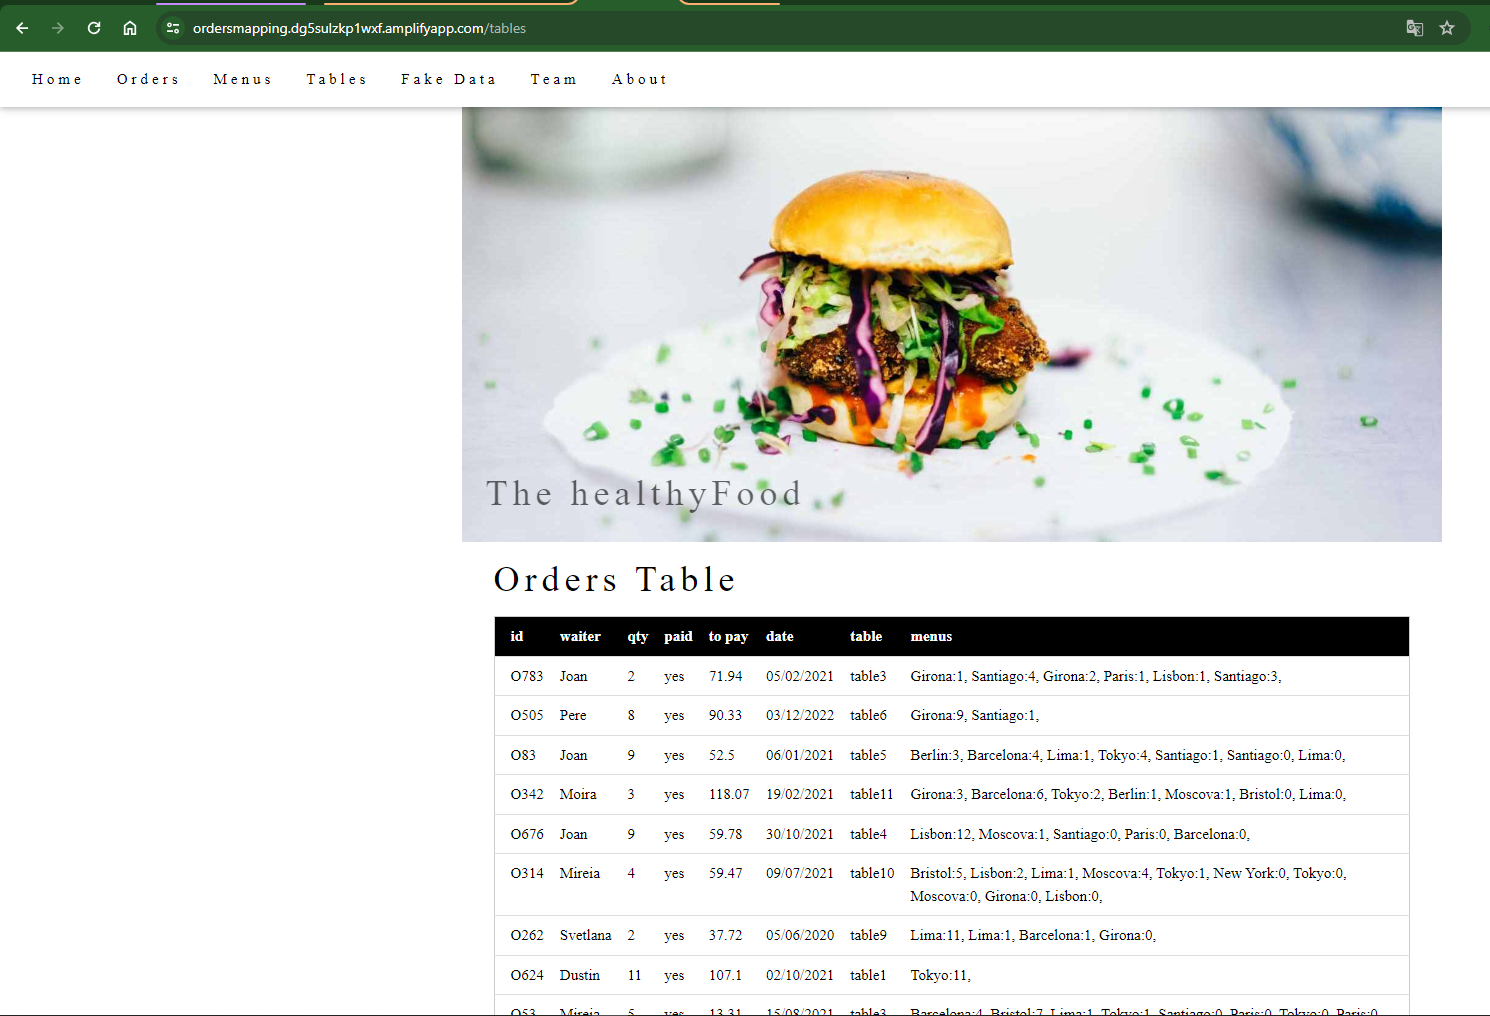
Our restaurant will have in this version three entities:
menutableorder, it joins menus and tables
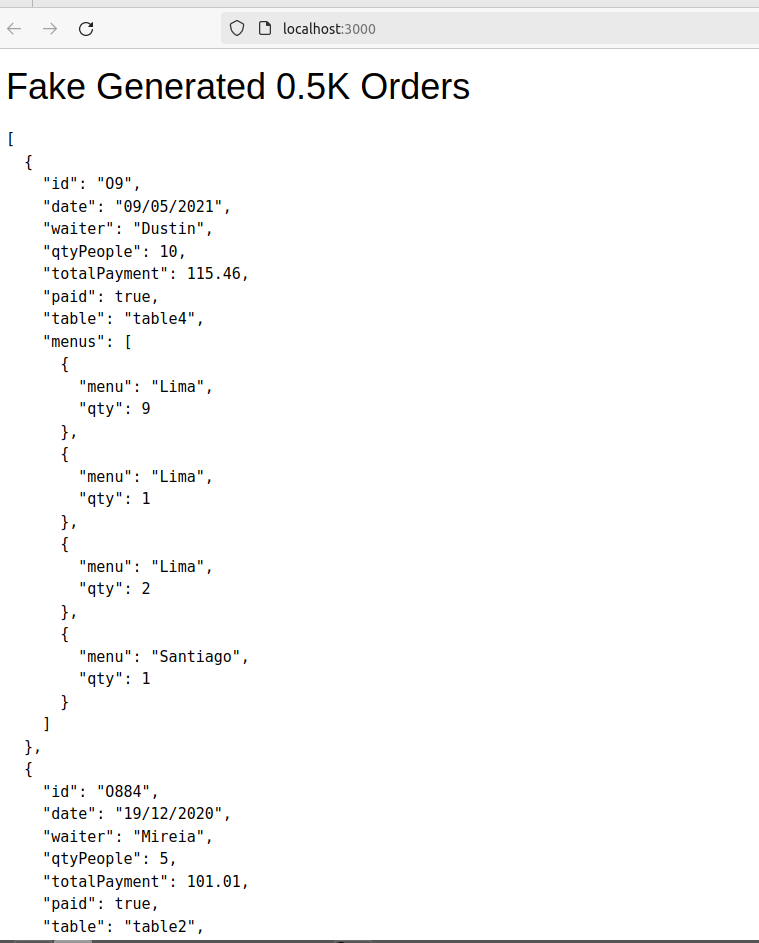
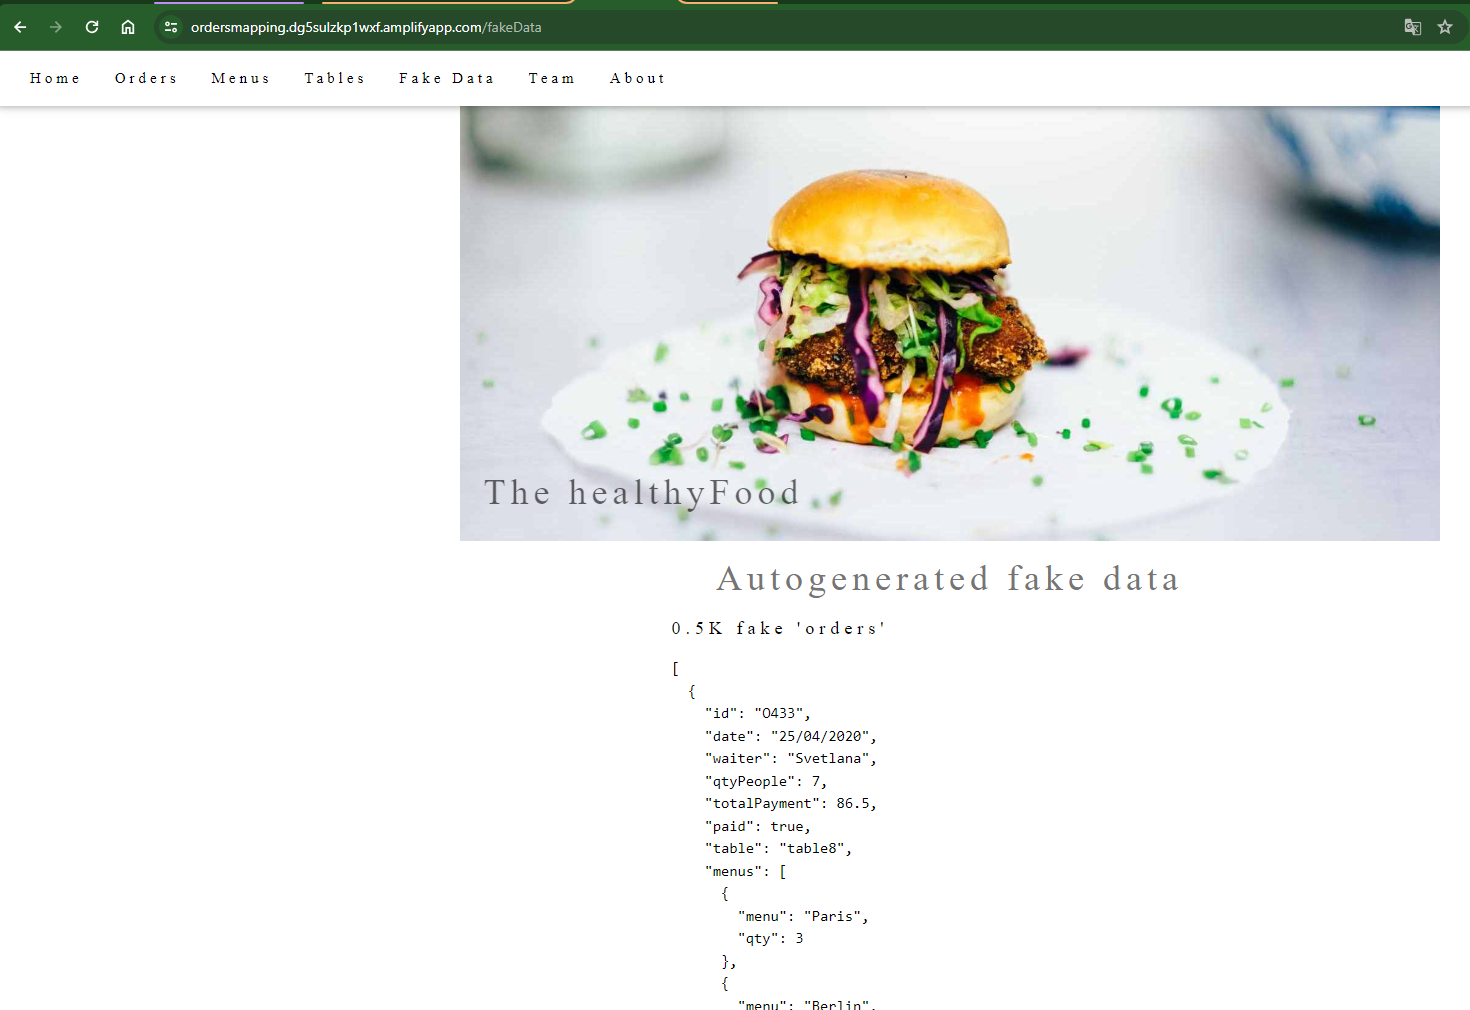
First at all, import the data from JSON into an array of literal object JS:
 {
    "id": "O505",
    "date": "03/12/2022",
    "waiter": "Pere",
    "qtyPeople": 8,
    "totalPayment": 90.33,
    "paid": true,
    "table": "table6",
    "menus": [
      {
        "menu": "Girona",
        "qty": 9
      },
      {
        "menu": "Santiago",
        "qty": 1
      }
    ]
  },
Then, map the orders into a new array of JSX nodes, for exemple a list for renderData ids:
OrderList.jsx
And eventually render <ul>{renderData}</ul>
Array.prototype.map() The map() method of Array instances creates a new array populated with the results of calling a provided function on every element in the calling array.
The map() method is an iterative method. map():
- creates a new array from calling a function for every array element.
- does not execute the function for empty elements.
- does not change the original array.
It calls a provided callbackFn function once for each element in an array and constructs a new array from the results.
OrderList.jsx
import "w3-css/w3.css";
import { ordersDataJSON } from "./ordersDataJSON.js";
export default function OrdersList() {
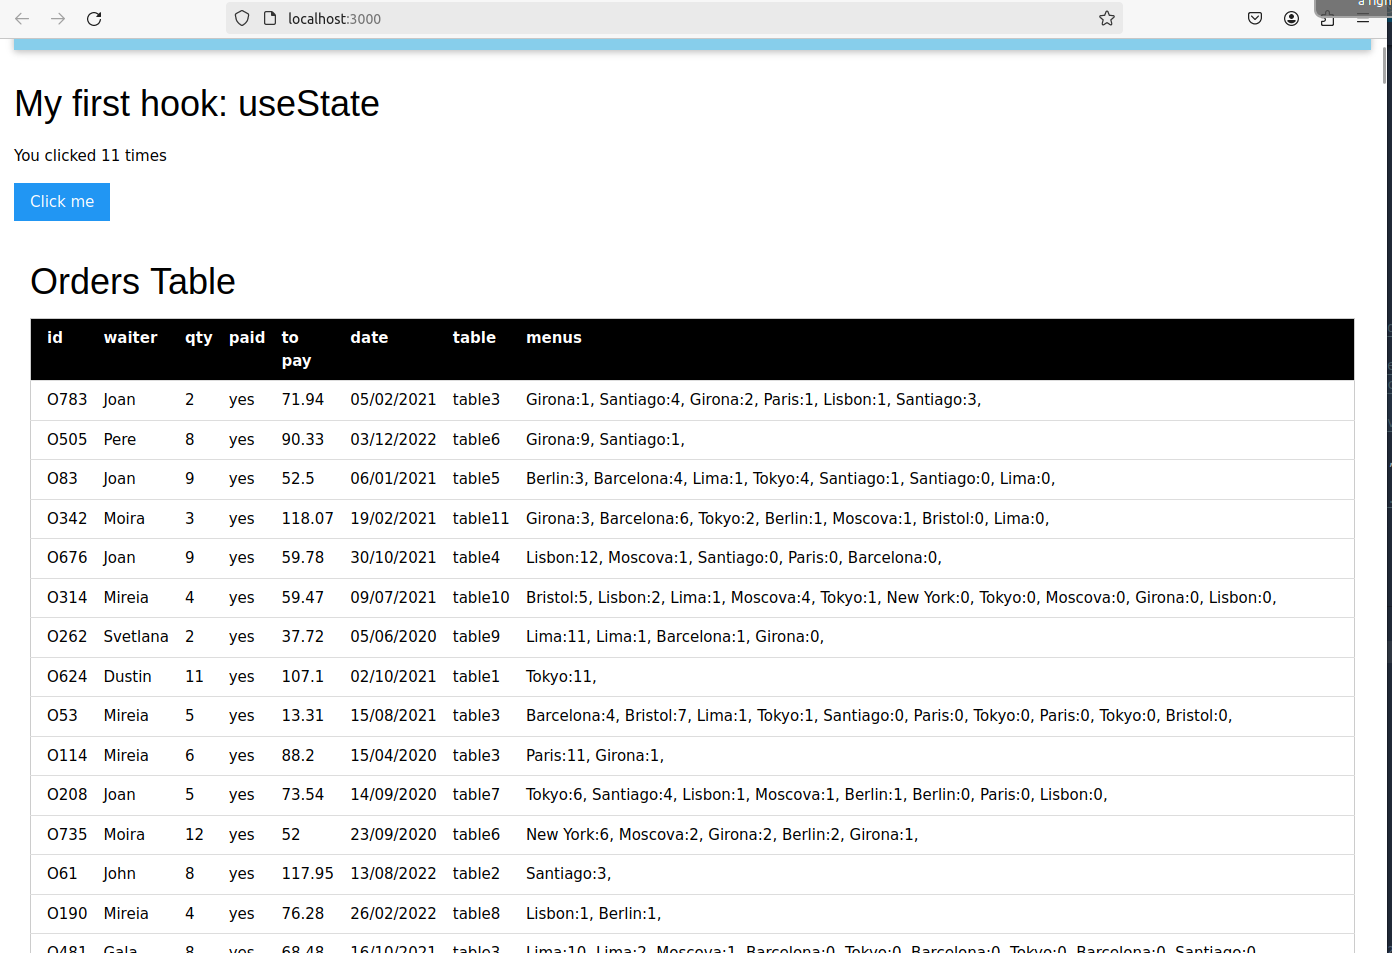
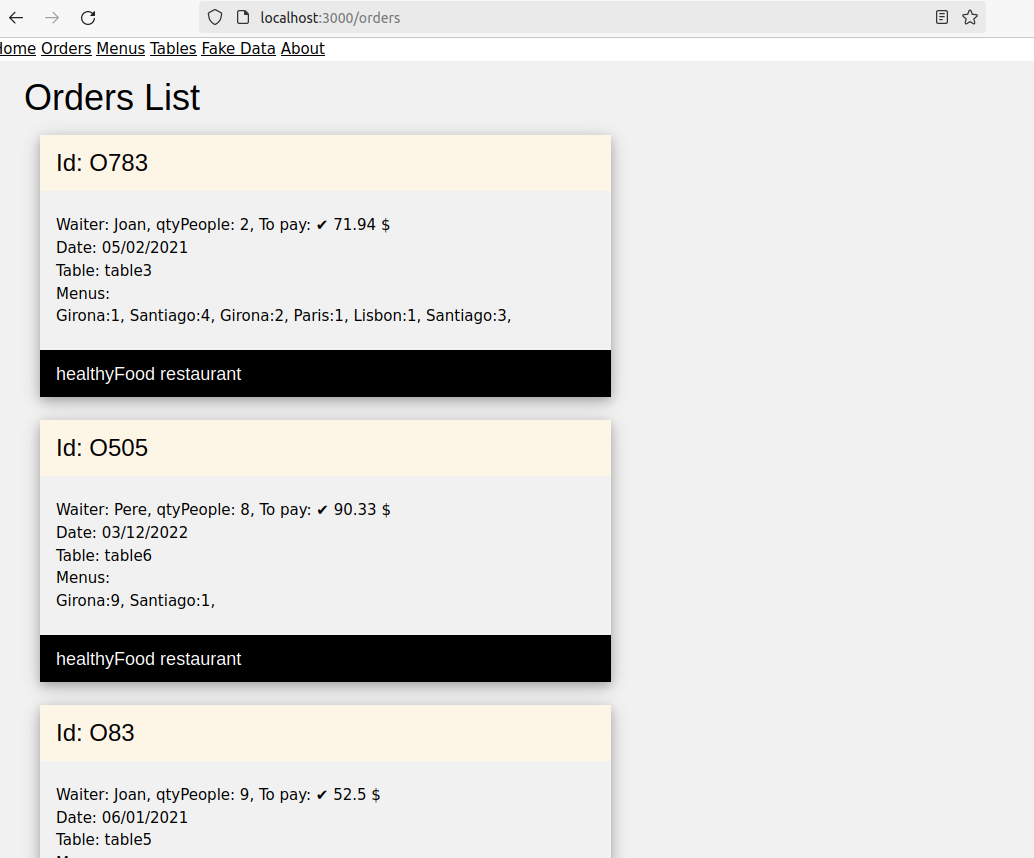
const renderData = ordersDataJSON.map((order) => (
<>
<div class="w3-card-4" style={{ width: "50%" }}>
<header class="w3-container w3-sand">
<h3>Id: {order.id}</h3>
</header>
<br />
<div class="w3-container">
Waiter: {order.waiter}, qtyPeople: {order.qtyPeople}, To pay:{" "}
{order.paid ? " ✔" : "X"} {order.totalPayment} $
</div>
<div class="w3-container">Date: {order.date}</div>
<div class="w3-container">Table: {order.table}</div>
<div class="w3-container">Menus:<br/>
{order.menus.map ( (menu) => ( <><span>{menu.menu}:{menu.qty}, </span></>)) }</div>
<br />
<footer class="w3-container w3-black">
<h5>healthyFood restaurant</h5>
</footer>
</div>
<br />
</>
));
//console.log(ordersDataJSON);
console.log("renderdata", renderData);
return (
<>
<div class="w3-container">
<h1>Orders List</h1>
<div class="w3-container">{renderData}</div>
</div>
</>
);
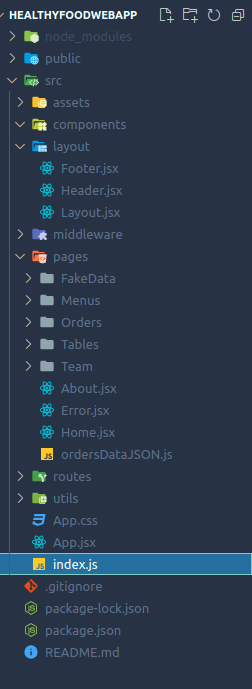
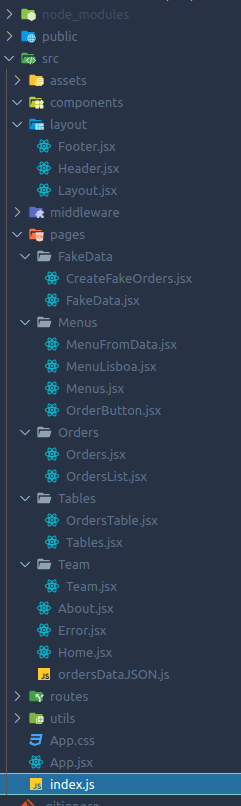
}4.5 Adding DDD
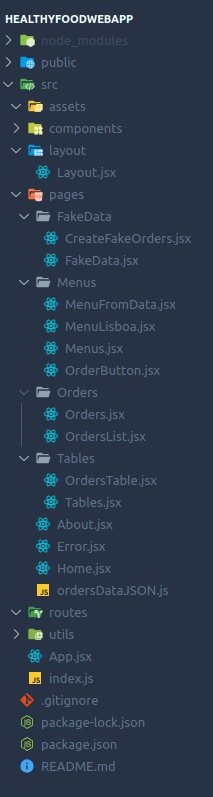
| Name | Description | Why | Example |
|---|---|---|---|
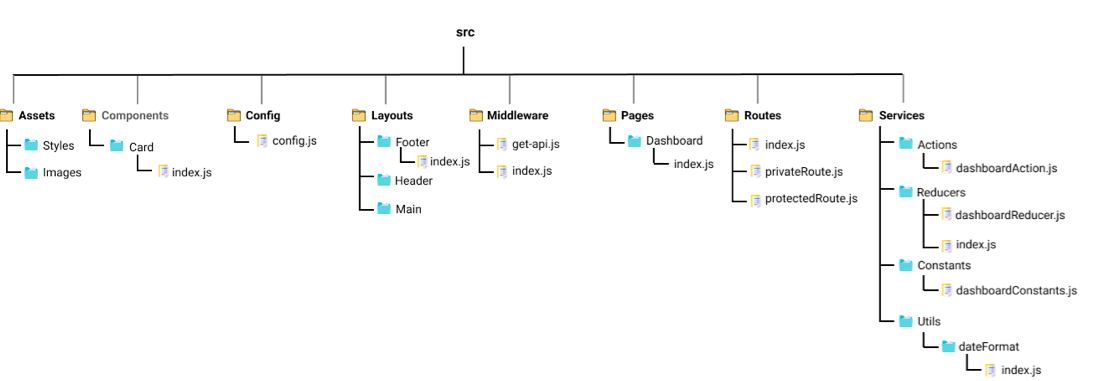
| Middleware | Provides intermediate processing logic, intercepting requests and responses, and performing tasks such as authentication, logging, api calls, etc. | Separates cross-cutting concerns from the main application logic, enhancing modularity and reusability. | AuthMiddleware.js, LoggerMiddleware.js, , ApiMiddleware.js |
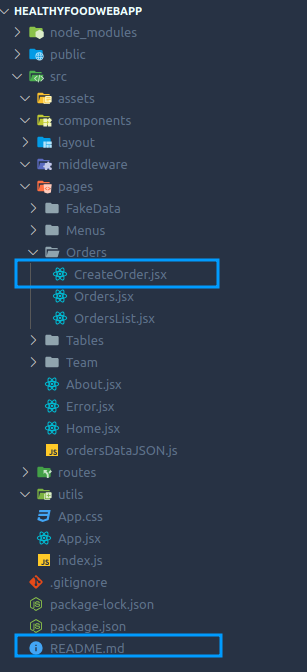
| Pages | Represents the main views or screens of the application, each typically corresponding to a specific URL route. | Organizes the user interface into distinct sections, improving navigation and usability. | Home.jsx, Orders.jsx, , Menus.jsx |
| Components | Encapsulates reusable UI elements or functional units, promoting modularization and facilitating composition. | Enhances maintainability by breaking down the UI into smaller, reusable pieces. | Button.jsx, Modal.jsx, Avatar.jsx |
| Utils | Contains utility functions and helper classes providing common functionalities needed throughout the application. | Reduces code duplication, improves readability, and promotes consistency. | apiUtils.js, dateUtils.js |
| Assets | Stores static files such as images, fonts, or CSS files used within the application. | Centralizes and manages static resources, simplifying asset management and deployment. | logo.png, font.ttf, styles.css |
| Layout | Defines the overall structure and arrangement of UI elements on the page, including headers, footers, sidebars, etc. | Promotes consistency in the visual presentation of the application and improves user experience. | MainLayout.jsx, SidebarLayout.jsx |
| Routes | Handles the mapping between URLs and corresponding components or views, defining the navigation paths within the application. | Facilitates navigation between different sections of the application and ensures proper routing. | AppRoutes.jsx, PrivateRoutes.jsx |
4.6 Adding CSS
- w3.css templates
- Gourment and catering template
- Gourment and catering sandbox
- GitHub code v0.5 - branch ordersMapping
To add W3.CSS to a React project, first, include the** W3.CSS CDN link** in the <head> section of your public/index.html file or install the dependency: mpm install w3-css
Then, utilize W3.CSS classes directly within your React components’ JSX code. Import the W3.CSS stylesheet in your main component or global stylesheet. Now, you can apply W3.CSS styles to your React components by adding the appropriate class names. Ensure compatibility and avoid conflicts with existing styles. Finally, leverage W3.CSS’s extensive documentation for guidance on styling your React project efficiently.
4.7 Deploying the React Project

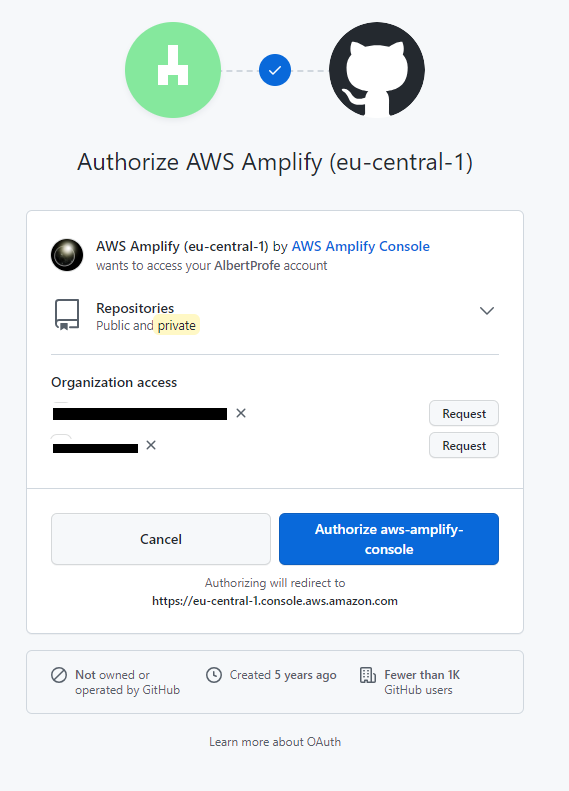
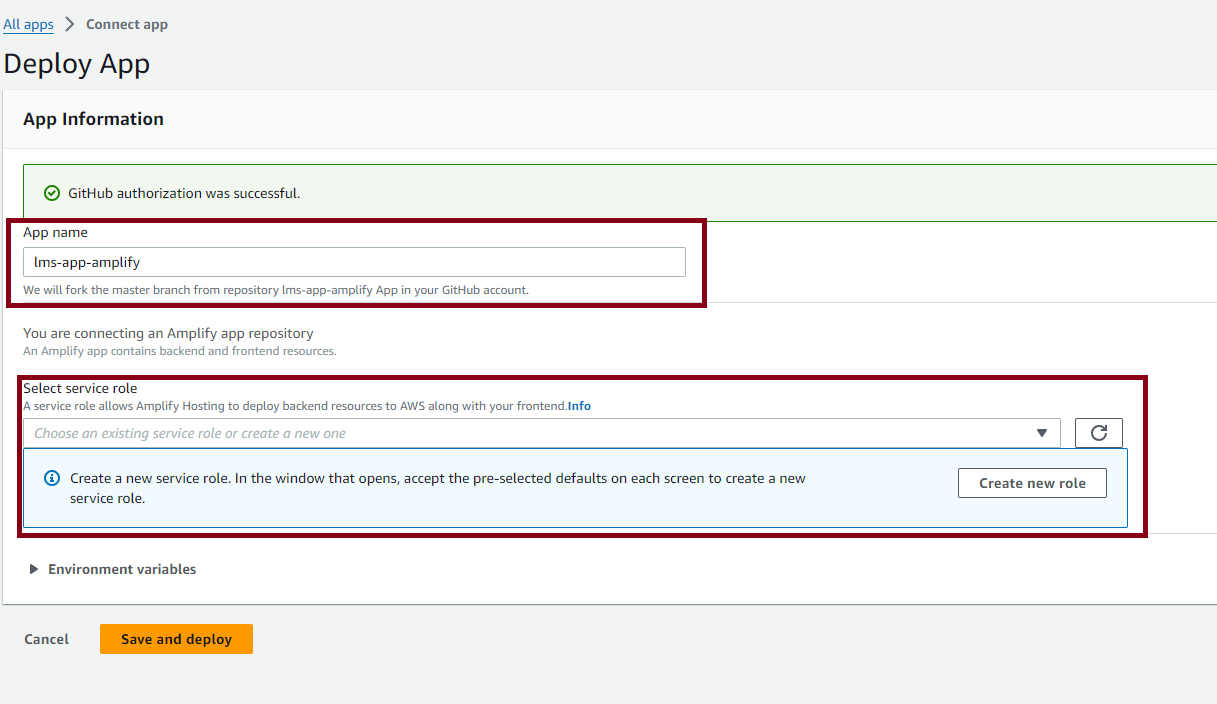
Upload project to GitHub
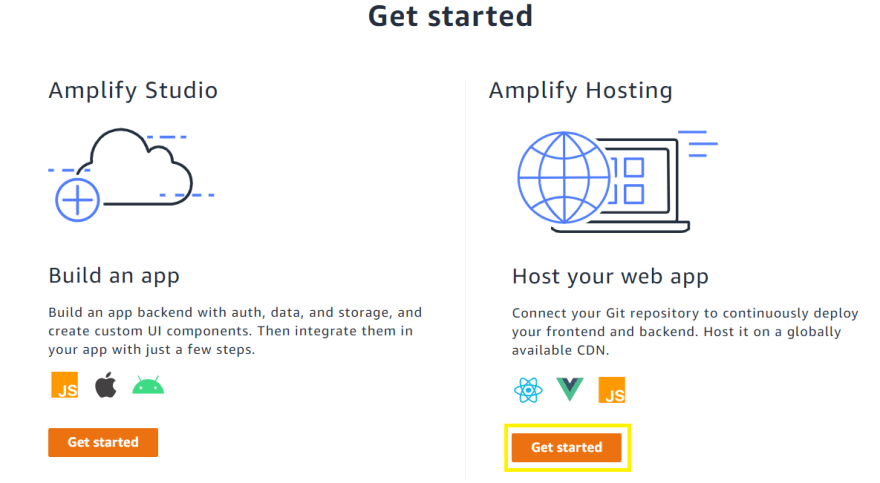
What is Amplify?
Amplify is everything you need to build full-stack web and mobile apps on AWS. Build and host your frontend, add features like auth and storage, connect to real-time data sources, deploy, and scale to millions of users.


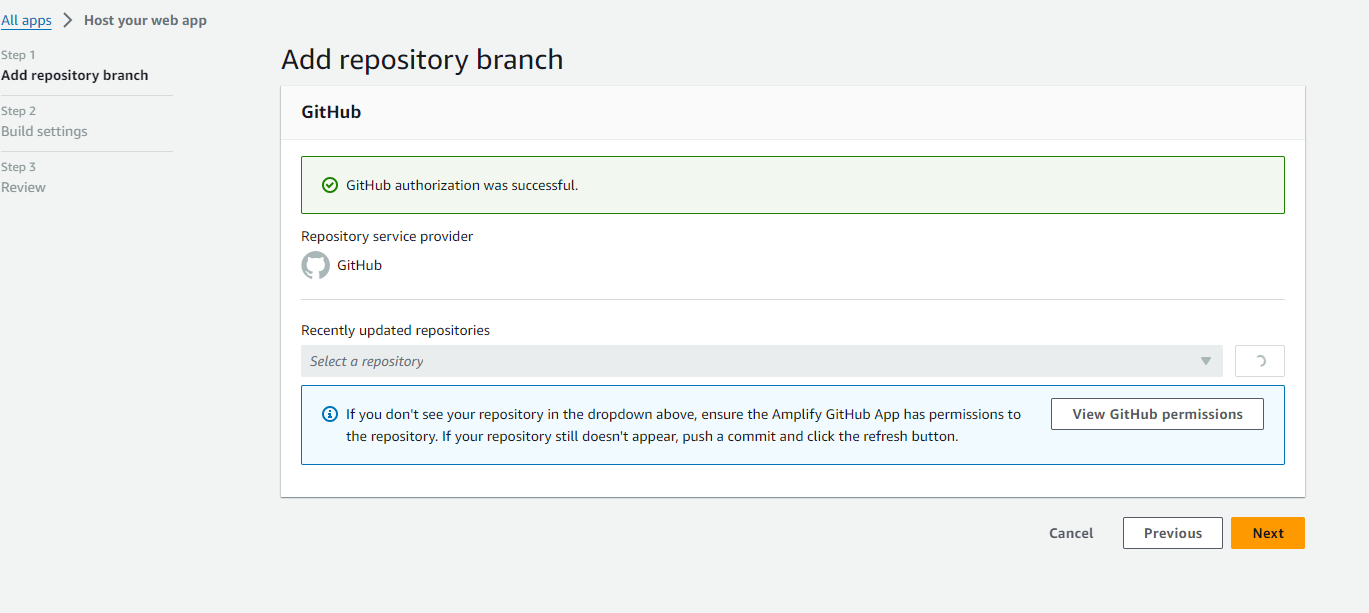
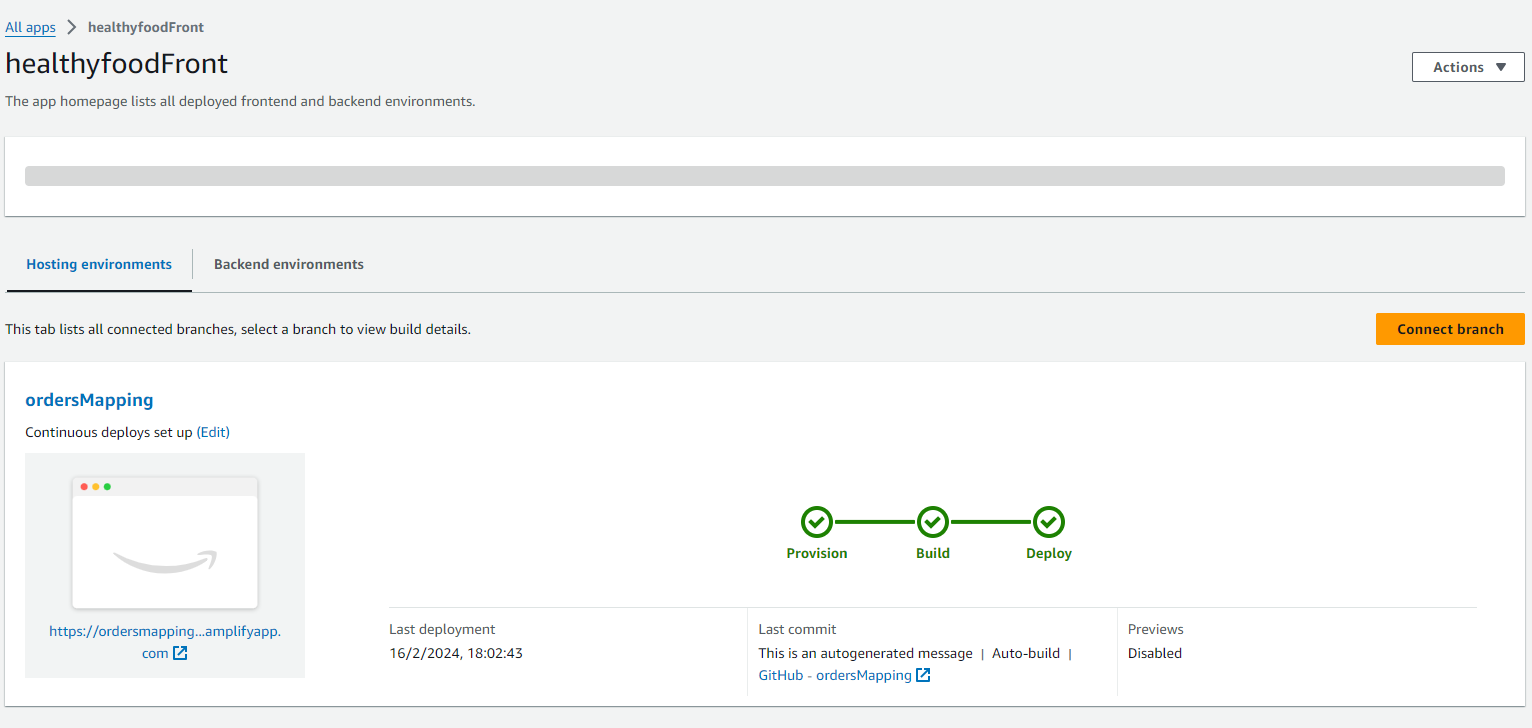
This tab lists all connected branches, select a branch to view build details: ordersMapping Continuous deploys set up
4.8 pull request: ordersMapping & createOrder into master
Pull requests let you tell others about changes you’ve pushed to a branch in a repository on GitHub.
Once a pull request is opened, you can discuss and review the potential changes with collaborators and add follow-up commits before your changes are merged into the base branch.
4.8.1 Initial code: master and two branches
Branch ordersMapping was created from master, and they apparently seem the same branch, but there are two heads, they are, in fact, two branches.
At this moment we have three heads: 220e0f3, 117e56a and 72db4f7
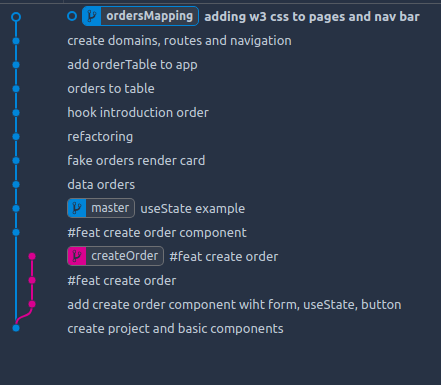
ordersMapping, createOrder,master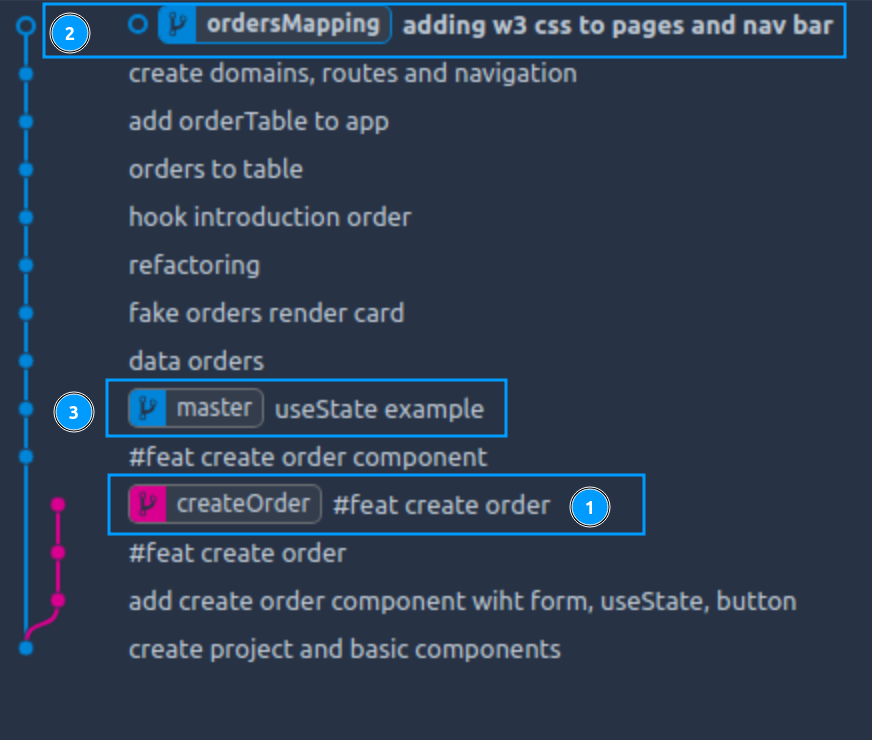
ordersMapping, createOrder,masterWith a new commit on masterit is clear that there are three branches.
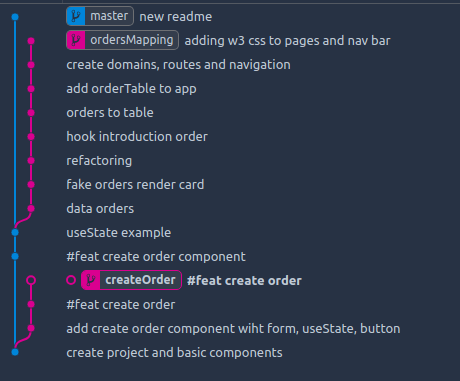
master
master4.8.2 pull request and merge
To merge two branches into master we are going to:
- first, review and merge pull request #1, “
Orders mapping#1,” containing 8 commits from the “ordersMapping” branch - Then, address conflicts in pull request #2, “
Master#2,” which integrated 4 commits from “createOrder” intomaster.- Resolve these conflicts, commit changes, and merge pull request #2.
- ensure all changes align with project standards.
- Finally, we need to verify the merged master branch for stability and functionality (review the final output project structure).
Efficiently managing conflicts and adhering to project guidelines ensures smooth integration of features into the master branch, maintaining code integrity and project continuity.
Let’s do the first pull request step-by-step:
This is the output documentation on Github.com:

pull request #1: Orders mapping #1
AlbertProfe merged 8 commits into master from ordersMapping
pull request #2: Master #2
AlbertProfe merged 4 commits into master from createOrder
Since the pull request #2, Master #2, have conflicts we must resolve them and then commit and merge before the pull request.

ordersMapping to master and then createOrdertomaster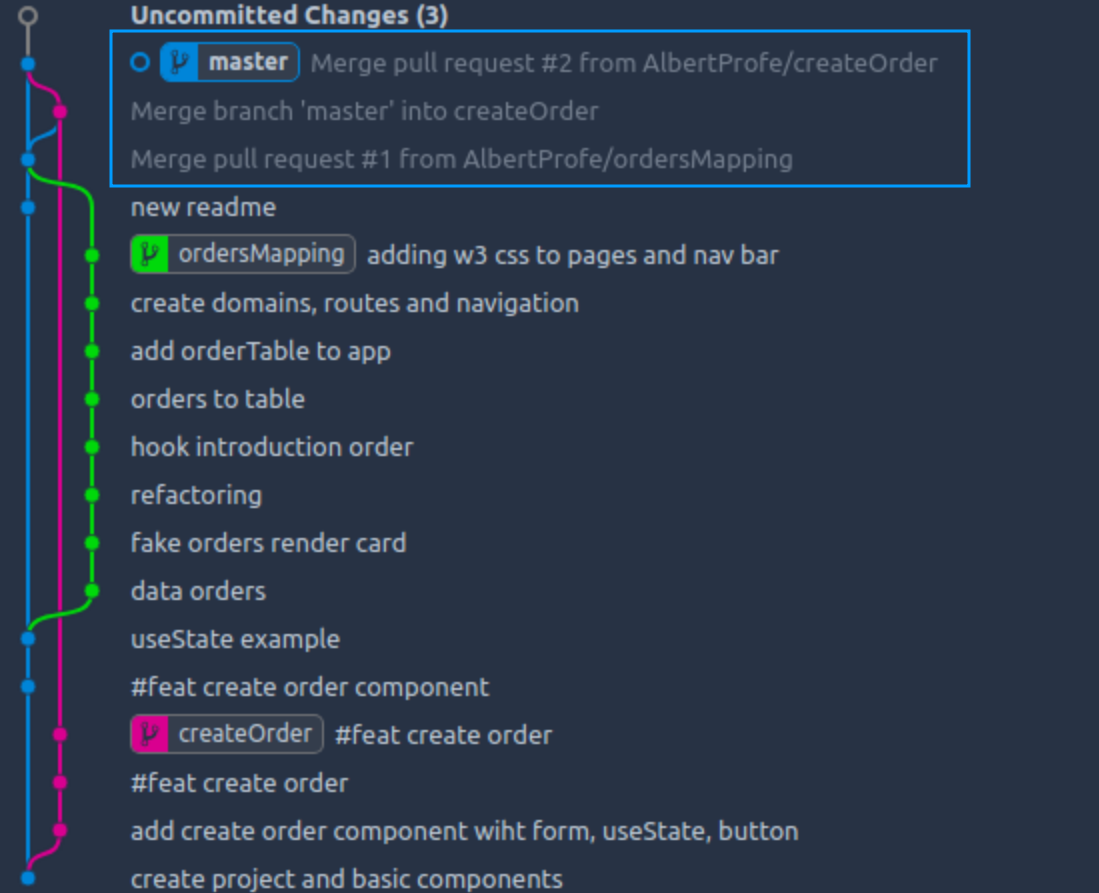
ordersMapping to master and then createOrdertomaster4.8.3 Final state: just master
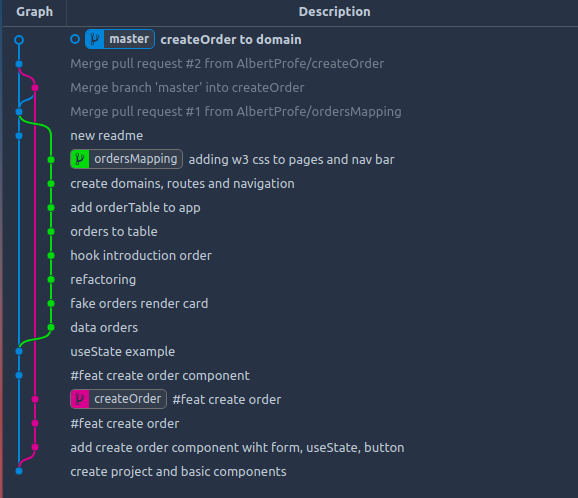
master to move createOrder component from root project to its domainFinal code
After the two pull requests, the master branch incorporates all commits from the two branches due to the process of merging.
When a pull request is accepted and merged into the master branch, all the changes (commits) from the respective branches are integrated into the master branch.
In the first pull request (#1: Orders mapping #1), 8 commits from the “ordersMapping” branch were merged into master. Similarly, in the second pull request (#2: Master #2), 4 commits from the “createOrder” branch were merged into master.
As a result, the master branch now includes all changes from both branches, ensuring that the latest developments from each branch are consolidated into the main codebase.
Now, the master has all the commits: