Lab#SB08-3: H2 and API Rest
Spring Boot Restaurant Management H2 and API Rest
📘 Spring Boot Lab#SB00-3: RestaurantManager
We are going to evolve the current Java SE Restaurant project into a Spring Boot Restaurant Management System with an H2 DB and API Rest manages by Swagger.
1 RestaurantManager Project Summary
Key Components
- Java Faker: Library for generating fake data. Java Faker GitHub
- @Bean Annotation: Spring annotation for declaring managed beans.
- H2 Database: In-memory database for testing. H2 Database Engine
- Swagger: Tool for API documentation. Swagger Documentation
- ResponseEntity: Spring class for HTTP response control.
- JUnit: Spring Boot uitlity for testing.
Approaches to Create Fake Customers
- Using @Bean and CommandLineRunner
- Using static method (not recommended)
- Using ApplicationRunner (recommended)
H2 Database Configuration
- In-memory: Temporary database, resets on application restart
- Local: Persistent storage on disk
- Mixed: In-memory for development, local for production
API and Controller
- CustomerController: Implements CRUD operations
- Uses Swagger annotations for API documentation
- Utilizes ResponseEntity for flexible HTTP responses
Service, Repo and JUnit
- @Service with all business logic from app
- JpaRepository interface
Additional Resources
2 Project structure
RestaurantManager directory structure represents a typical Java Spring Boot project for a restaurant management application.
Here’s a basic explanation of the main components:
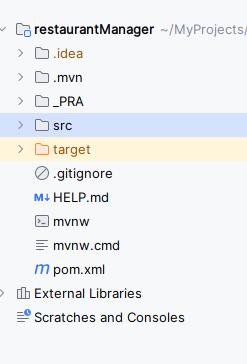
Root Directory
HELP.md: contains project general information aboutRestaurantManager.mvnwandmvnw.cmd:Maven wrapperscripts forUnix-likesystems andWindows, respectively.pom.xml: TheMavenproject configuration file.
Source Code (src)
The src directory contains the main application code and test code.
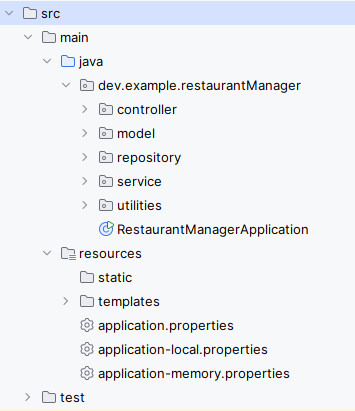
Main Application Code (src/main)
java/dev/example/restaurantManager: The root package for the application.controller: Contains controller classes for handling HTTP requests.model: Defines the data models (entities) for the application.repository: Interfaces for database operations.service: Service layer implementation.utilities: Utility classes, such as data loaders.RestaurantManagerApplication.java: The main class to run the Spring Boot application.
Resources (src/main/resources)
- Configuration files (
application*.properties) - Static resources and templates (.js, .css, etc..)
Test Code (src/test)
Contains test classes for the application.
Build Output (target)
This directory contains compiled classes, JAR files, and other build artifacts.
Project Structure
The project follows a typical MVC (Model-View-Controller) structure with additional layers:
- Models (in
modelpackage) - Views (in
resources/templates) - Controllers (in
controllerpackage) - Services (in
servicepackage) - Repositories (in
repositorypackage)
This structure allows for a clean separation of concerns and promotes maintainability and scalability of the application.
Code
.
├── HELP.md
├── mvnw
├── mvnw.cmd
├── pom.xml
├── _PRA
│ └── PRA01.md
├── src
│ ├── main
│ │ ├── java
│ │ │ └── dev
│ │ │ └── example
│ │ │ └── restaurantManager
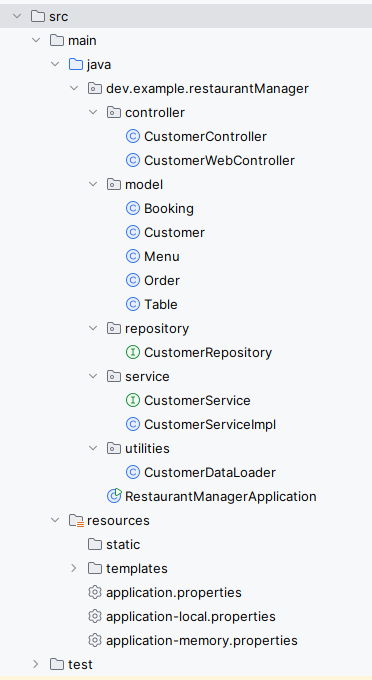
│ │ │ ├── controller
│ │ │ │ ├── CustomerController.java
│ │ │ │ └── CustomerWebController.java
│ │ │ ├── model
│ │ │ │ ├── Booking.java
│ │ │ │ ├── Customer.java
│ │ │ │ ├── Menu.java
│ │ │ │ ├── Order.java
│ │ │ │ └── Table.java
│ │ │ ├── repository
│ │ │ │ └── CustomerRepository.java
│ │ │ ├── RestaurantManagerApplication.java
│ │ │ ├── service
│ │ │ │ ├── CustomerServiceImpl.java
│ │ │ │ └── CustomerService.java
│ │ │ └── utilities
│ │ │ └── CustomerDataLoader.java
│ │ └── resources
│ │ ├── application-local.properties
│ │ ├── application-memory.properties
│ │ ├── application.properties
│ │ ├── static
│ │ └── templates
│ │ └── home.html
│ └── test
│ └── java
│ └── dev
│ └── example
│ └── restaurantManager
│ ├── CustomerRepositoryTest.java
│ └── RestaurantManagerApplicationTests.java
└── target
├── classes
│ ├── application-local.properties
│ ├── application-memory.properties
│ ├── application.properties
│ ├── dev
│ │ └── example
│ │ └── restaurantManager
│ │ ├── controller
│ │ │ ├── CustomerController.class
│ │ │ └── CustomerWebController.class
│ │ ├── model
│ │ │ ├── Booking.class
│ │ │ ├── Customer.class
│ │ │ ├── Menu.class
│ │ │ ├── Order.class
│ │ │ └── Table.class
│ │ ├── repository
│ │ │ └── CustomerRepository.class
│ │ ├── RestaurantManagerApplication.class
│ │ ├── service
│ │ │ ├── CustomerService.class
│ │ │ └── CustomerServiceImpl.class
│ │ └── utilities
│ │ └── CustomerDataLoader.class
│ └── templates
│ └── home.html
├── generated-sources
│ └── annotations
├── generated-test-sources
│ └── test-annotations
├── maven-archiver
│ └── pom.properties
├── maven-status
│ └── maven-compiler-plugin
│ ├── compile
│ │ └── default-compile
│ │ ├── createdFiles.lst
│ │ └── inputFiles.lst
│ └── testCompile
│ └── default-testCompile
│ ├── createdFiles.lst
│ └── inputFiles.lst
├── restaurantManager-0.0.1-SNAPSHOT.jar
├── restaurantManager-0.0.1-SNAPSHOT.jar.original
├── surefire-reports
│ ├── dev.example.restaurantManager.RestaurantManagerApplicationTests.txt
│ └── TEST-dev.example.restaurantManager.RestaurantManagerApplicationTests.xml
└── test-classes
└── dev
└── example
└── restaurantManager
├── CustomerRepositoryTest.class
└── RestaurantManagerApplicationTests.class3 Fake customer RestaurantManager
3.1 Java Faker
Java Faker is a library that generates fake data for various purposes such as testing, development, and demonstration.
Java Faker is a tool that creates realistic-looking fake data, including names, addresses, phone numbers, and much more.
It’s useful for:
- Populating databases with test data
- Creating mock objects for unit testing
- Generating sample data for applications
- Prototyping user interfaces
The library provides a wide range of pre-defined categories (like name, address, phone number) and methods to generate fake data within those categories. It’s easy to use and can generate data in multiple languages and locales.
For example, you can create a Faker instance and generate fake data like this:
Faker faker = new Faker();
 // Generates a random full name
String name = faker.name().fullName();
// Generates a random email address
String email = faker.internet().emailAddress();
Dependency for maven:
3.2 Bean
@Bean in Spring is:
- A method-level annotation
- Used to declare a Spring bean typically used in
@Configurationclasses - Tells Spring to:
- manage the object returned by the method
- and allows you to configure and customize the bean
- JavaBeans - Wikipedia
@Beanin Spring is like telling a toy factory to make a special toy for you. When you use@Bean, you are saying,:
- “Please create this toy and keep it safe so I can play with it whenever I want.”
Just like the factory remembers how to make your favorite toy, Spring remembers how to create and manage the special object you asked for, so you can use it in your game whenever you need it.
Example:
@Configuration
public class AppConfig {

@Bean
public MyService myService() {
return new MyService();
}
}
3.2.1 Approach #1: @Bean
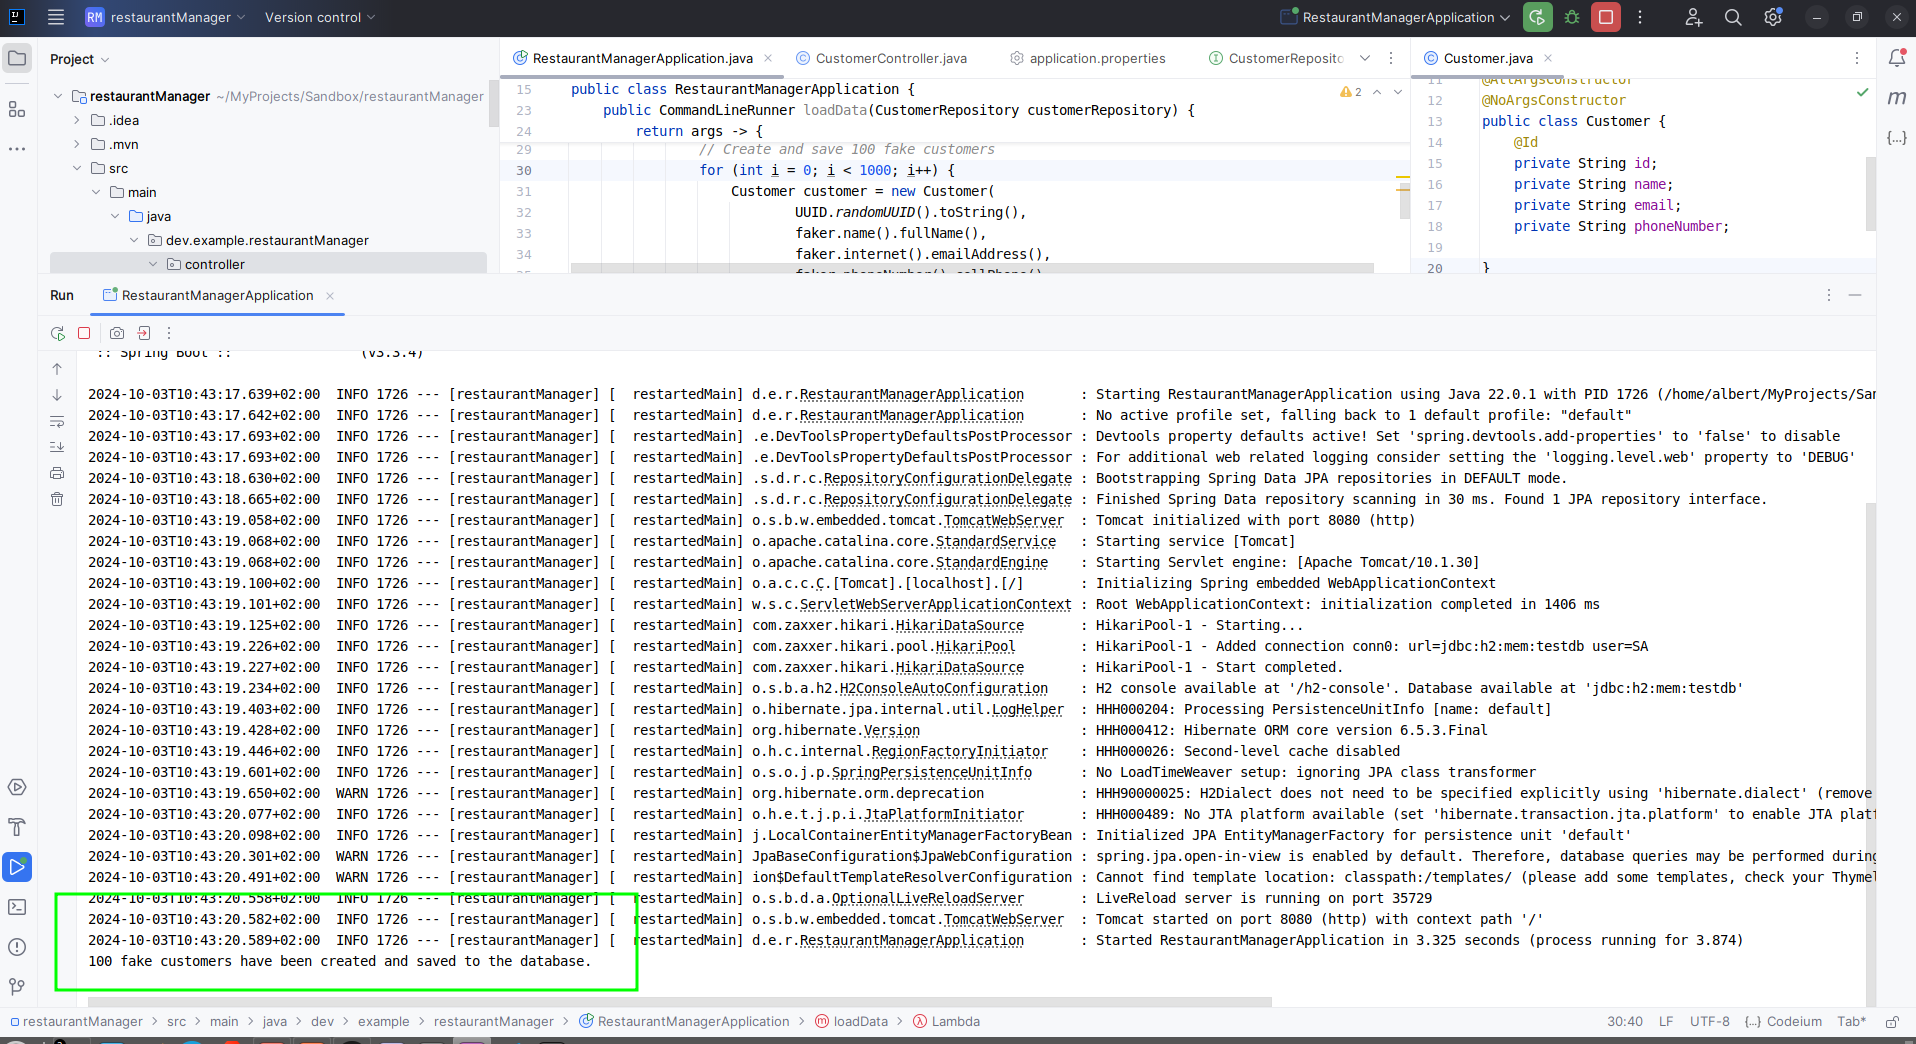
This CommandLineRunnerdoes the following:
- It checks if the database is empty by counting the number of customers in the repository.
- If the database is empty, it creates a
new Fakerinstance with the US locale. - It then generates 100 fake customers using Faker to create realistic
names,emailaddresses, andphone numbers. - Each customer is assigned a random
UUIDas their ID. - The fake
customersare saved to theCustomerRepository. - Finally, it prints a message confirming that 100 fake customers have been created and saved.
package dev.example.restaurant;

import com.github.javafaker.Faker;
import dev.example.restaurant.model.Customer;
import dev.example.restaurant.repository.CustomerRepository;
import org.springframework.boot.CommandLineRunner;
import org.springframework.boot.SpringApplication;
import org.springframework.boot.autoconfigure.SpringBootApplication;
import org.springframework.context.annotation.Bean;

import java.util.Locale;
import java.util.UUID;

@SpringBootApplication
public class RestaurantVaadinApplication {

    public static void main(String[] args) {
        SpringApplication.run(RestaurantVaadinApplication.class, args);
    }

    @Bean
    public CommandLineRunner loadData(CustomerRepository customerRepository) {
        return args -> {
            // Check if the database is empty
            if (customerRepository.count() == 0) {
                Faker faker = new Faker(new Locale("en-US"));

                // Create and save 100 fake customers
                for (int i = 0; i < 100; i++) {
                    Customer customer = new Customer(
                            UUID.randomUUID().toString(),
                            faker.name().fullName(),
                            faker.internet().emailAddress(),
                            faker.phoneNumber().cellPhone()
                    );
                    customerRepository.save(customer);
                }

                System.out.println("100 fake customers have been"
                + " created and saved to the database.");
            }
        };
    }
}
3.2.2 Approach #2 static
In this approach:
- We’ve removed the
@Beanannotation and theCommandLineRunner. - We’ve added a static
CustomerRepositoryfield with@Autowiredannotation. - We’ve created a
staticmethodcreateFakeCustomers()that contains the logic for creating and saving fake customers. - In the
mainmethod, we callcreateFakeCustomers()after the Spring application context is initialized.
There’s an important caveat with this approach: using static fields with
@Autowiredis generally not recommended in Spring applications.It can lead to issues with testing and violates the principle of dependency injection.
A better approach would be to use an
ApplicationRunnerorCommandLineRunnerbean, which allows for proper dependency injection.
package dev.example.restaurant;

import com.github.javafaker.Faker;
import dev.example.restaurant.model.Customer;
import dev.example.restaurant.repository.CustomerRepository;
import org.springframework.beans.factory.annotation.Autowired;
import org.springframework.boot.SpringApplication;
import org.springframework.boot.autoconfigure.SpringBootApplication;

import java.util.Locale;
import java.util.UUID;

@SpringBootApplication
public class RestaurantVaadinApplication {

    @Autowired
    private static CustomerRepository customerRepository;

    public static void main(String[] args) {
        SpringApplication.run(RestaurantVaadinApplication.class, args);
        createFakeCustomers();
    }

    public static void createFakeCustomers() {
        // Check if the database is empty
        if (customerRepository.count() == 0) {
            Faker faker = new Faker(new Locale("en-US"));

            // Create and save 100 fake customers
            for (int i = 0; i < 100; i++) {
                Customer customer = new Customer(
                        UUID.randomUUID().toString(),
                        faker.name().fullName(),
                        faker.internet().emailAddress(),
                        faker.phoneNumber().cellPhone()
                );
                customerRepository.save(customer);
            }

            System.out.println("100 fake customers have been"
            + " created and saved to the database.");
        }
    }
}
3.2.3 Approach #3
package dev.example.restaurant;

import com.github.javafaker.Faker;
import dev.example.restaurant.model.Customer;
import dev.example.restaurant.repository.CustomerRepository;
import org.springframework.beans.factory.annotation.Autowired;
import org.springframework.boot.ApplicationRunner;
import org.springframework.boot.SpringApplication;
import org.springframework.boot.autoconfigure.SpringBootApplication;
import org.springframework.context.annotation.Bean;

import java.util.Locale;
import java.util.UUID;

@SpringBootApplication
public class RestaurantVaadinApplication {

    public static void main(String[] args) {
        SpringApplication.run(RestaurantVaadinApplication.class, args);
    }

    @Bean
    public ApplicationRunner dataLoader(CustomerRepository customerRepository) {
        return args -> createFakeCustomers(customerRepository);
    }

    private void createFakeCustomers(CustomerRepository customerRepository) {
        // Check if the database is empty
        if (customerRepository.count() == 0) {
            Faker faker = new Faker(new Locale("en-US"));

            // Create and save 100 fake customers
            for (int i = 0; i < 100; i++) {
                Customer customer = new Customer(
                        UUID.randomUUID().toString(),
                        faker.name().fullName(),
                        faker.internet().emailAddress(),
                        faker.phoneNumber().cellPhone()
                );
                customerRepository.save(customer);
            }

            System.out.println("100 fake customers have been created"
            + " and saved to the database.");
        }
    }
}
This approach maintains proper dependency injection and is more in line with Spring best practices for a few key reasons:
- Proper dependency injection: By using an
ApplicationRunnerbean, we allow Spring to manage the lifecycle and injection of dependencies. The CustomerRepository is properly injected by Spring, rather than being accessed statically. - Separation of concerns: The data loading logic is separated from the main application class, improving modularity and maintainability.
- Testability: This approach makes it easier to unit test the data loading logic in isolation, as dependencies can be easily mocked.
- Constructor injection: By passing the CustomerRepository as a parameter to the ApplicationRunner, we’re using constructor injection, which is considered a best practice in Spring.
- Avoiding static dependencies: Static
@Autowiredfields are generally discouraged as they can lead to issues with testing and violate dependency injection principles. - Flexibility: This approach allows for easier configuration and potential customization of when and how the data loading occurs.
- Alignment with Spring lifecycle: Using
ApplicationRunnerensures the data loading happens at the appropriate time during application startup, after the Spring context is fully initialized.
By following these practices, the code becomes more maintainable, testable, and aligned with Spring’s dependency injection principles.
4 H2 DB
4.1 H2 in RestaurantManager in memory
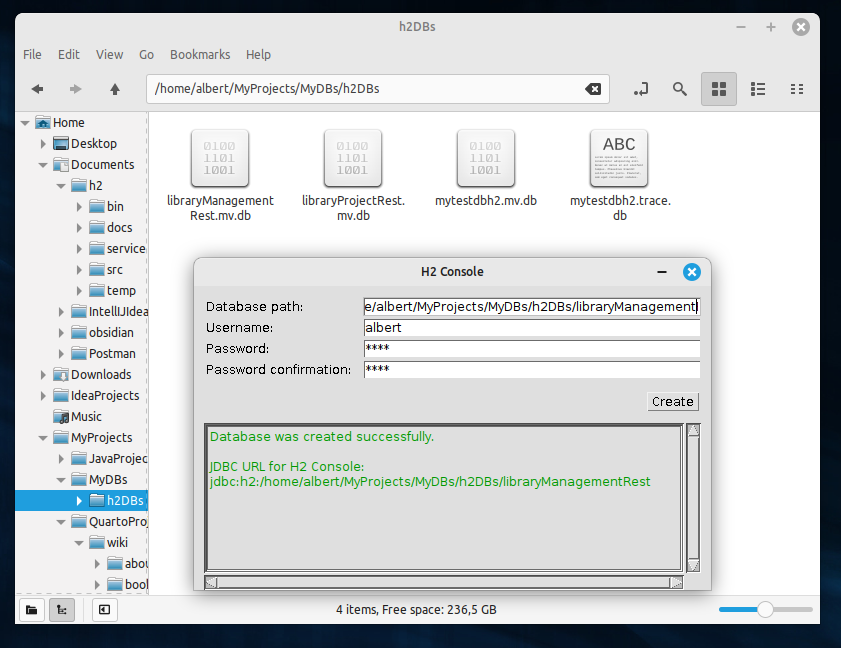
4.2 Install and create a H2 DB
References:
Step-by-step:
- Download and install
Java JDKfrom the officialOraclewebsite. - Download and install Spring Boot from the official
Springwebsite. - Download the
H2database from the officialH2website. - Extract the downloaded file to a location on your
Linuxmachine. - Execute
H2Desktop app and create a localH2 DB.
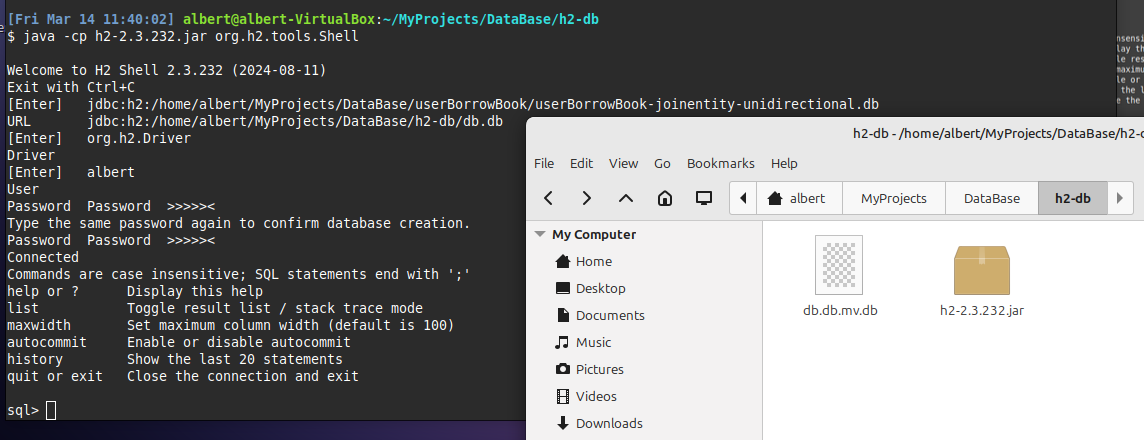
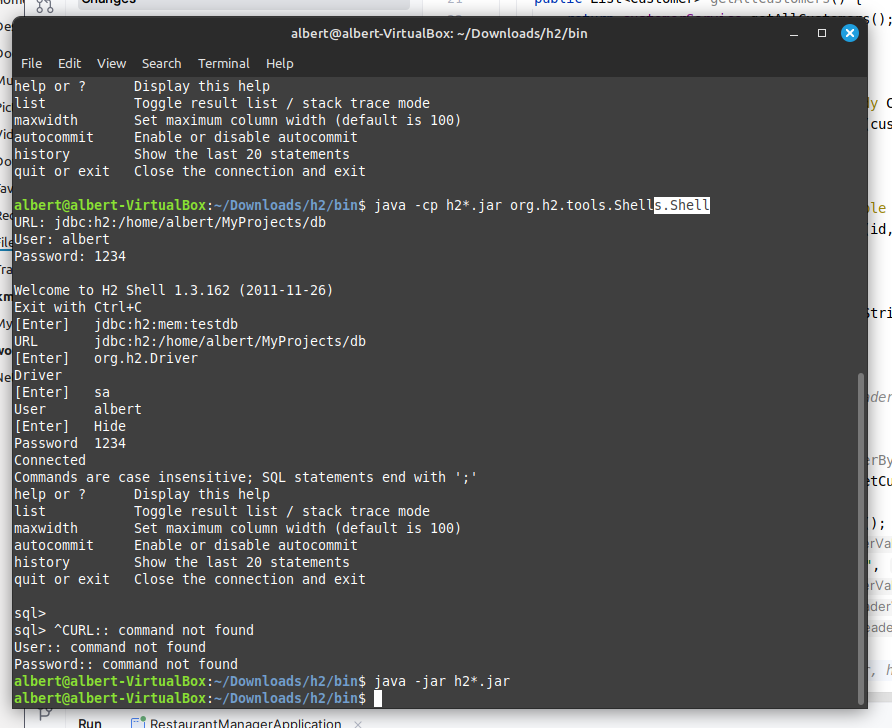
4.2.1 H2 local DB creation using CLI
java -cp h2-x.x.x.jar org.h2.Shell
Old version:
java -cp h2-x.x.x.jar org.h2.Shells.Shell
Prerequisites:
- Java Runtime Environment (JRE) installed
- H2 database JAR file downloaded
Download H2 Database
- Visit the official H2 database website: https://www.h2database.com
- Download the latest version of H2
Extract the H2 JAR File
- Unzip the downloaded file
- Locate the
h2-x.x.x.jarfile (where x.x.x is the version number)
Open Command Prompt or Terminal
- Navigate to the directory containing the H2 JAR file
Start H2 Console
- Run the following command:
java -cp h2-x.x.x.jar org.h2.tools.Console - Replace
x.x.xwith your actual H2 version number
Connect to the Database
- In the H2 Console, use the following settings:
- Driver Class:
org.h2.Driver - JDBC URL:
jdbc:h2:~/test(creates a ‘test’ database in your home directory) - User Name:
sa(default) - Password: (leave blank for default)
- Driver Class:
Create Tables and Data
Use SQL commands to create tables and insert data, for example:
Accessing the Database via CLI
- To access the database directly from the command line:
java -cp h2-x.x.x.jar org.h2.tools.Shell - Follow the prompts to connect to your database
Stopping the Database
- Close the H2 Console window
- Or, if running in background, find the Java process and terminate it
Remember to replace x.x.x with the actual version number of your H2 JAR file in all commands.
4.3 Configuring H2 Database in Spring Boot with DDL Auto-generation
Dependencies
First, ensure you have the necessary dependencies in your pom.xml (for Maven) or build.gradle (for Gradle):
application Properties
In your application.properties file, add the following configurations:
# H2 Database Configuration
spring.datasource.url=jdbc:h2:mem:testdb
spring.datasource.driverClassName=org.h2.Driver
spring.datasource.username=sa
spring.datasource.password=

# H2 Console Configuration (optional)
spring.h2.console.enabled=true
spring.h2.console.path=/h2-console

# JPA and Hibernate Configuration
spring.jpa.database-platform=org.hibernate.dialect.H2Dialect
spring.jpa.hibernate.ddl-auto=update
spring.jpa.show-sql=true
Explanation of Properties
spring.datasource.url: Specifies the JDBC URL for H2.jdbc:h2:mem:testdbcreates an in-memory database named “testdb”.spring.datasource.driverClassName: Specifies the H2 driver class.spring.datasource.usernameandspring.datasource.password: Set the database credentials.spring.h2.console.enabled: Enables the H2 web console for database management.spring.h2.console.path: Sets the path to access the H2 console.spring.jpa.database-platform: Specifies the Hibernate dialect for H2.spring.jpa.hibernate.ddl-auto=update: This is the key property for DDL auto-generation. It tells Hibernate to automatically create or update the database schema based on your entity classes.spring.jpa.show-sql=true: Enables logging of SQL statements.
DDL Auto-generation Options
The spring.jpa.hibernate.ddl-auto property can have the following values:
create: Drops and creates the schema at application startup.create-drop: Creates the schema at startup and drops it at shutdown.update: Updates the schema if necessary (recommended for development).validate: Validates the schema but makes no changes.none: Disables DDL handling.
Entity Classes
Create your entity classes with JPA annotations. Hibernate will use these to generate the DDL:
@Entity
public class User {
@Id
@GeneratedValue(strategy = GenerationType.IDENTITY)
private Long id;
private String name;
// getters, setters, constructors
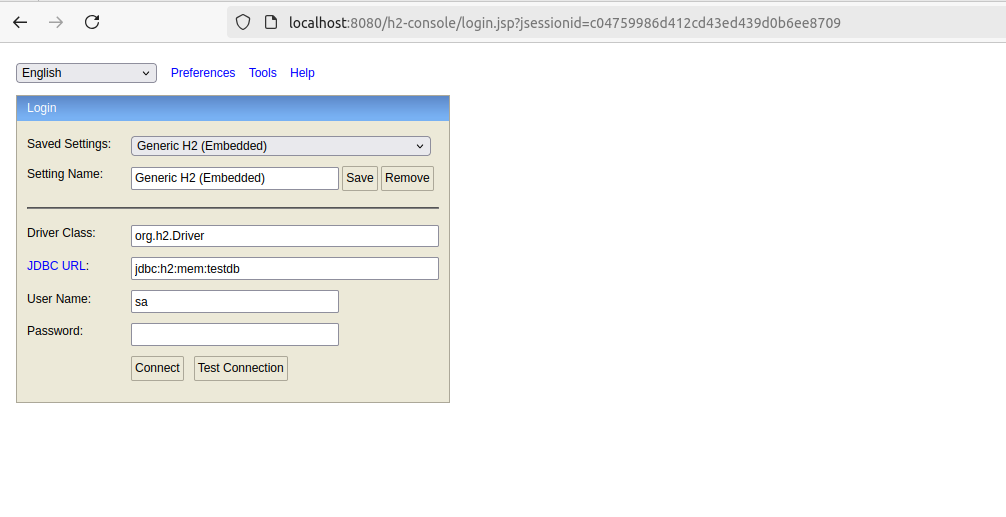
}Accessing the Database
- The H2 console will be available at
http://localhost:8080/h2-console(assuming default port). - Use the JDBC URL, username, and password specified in your properties to connect.
Remember to use update or create-drop carefully in production environments to avoid data loss.
5 API Rest & Swagger
5.1 What is Swagger
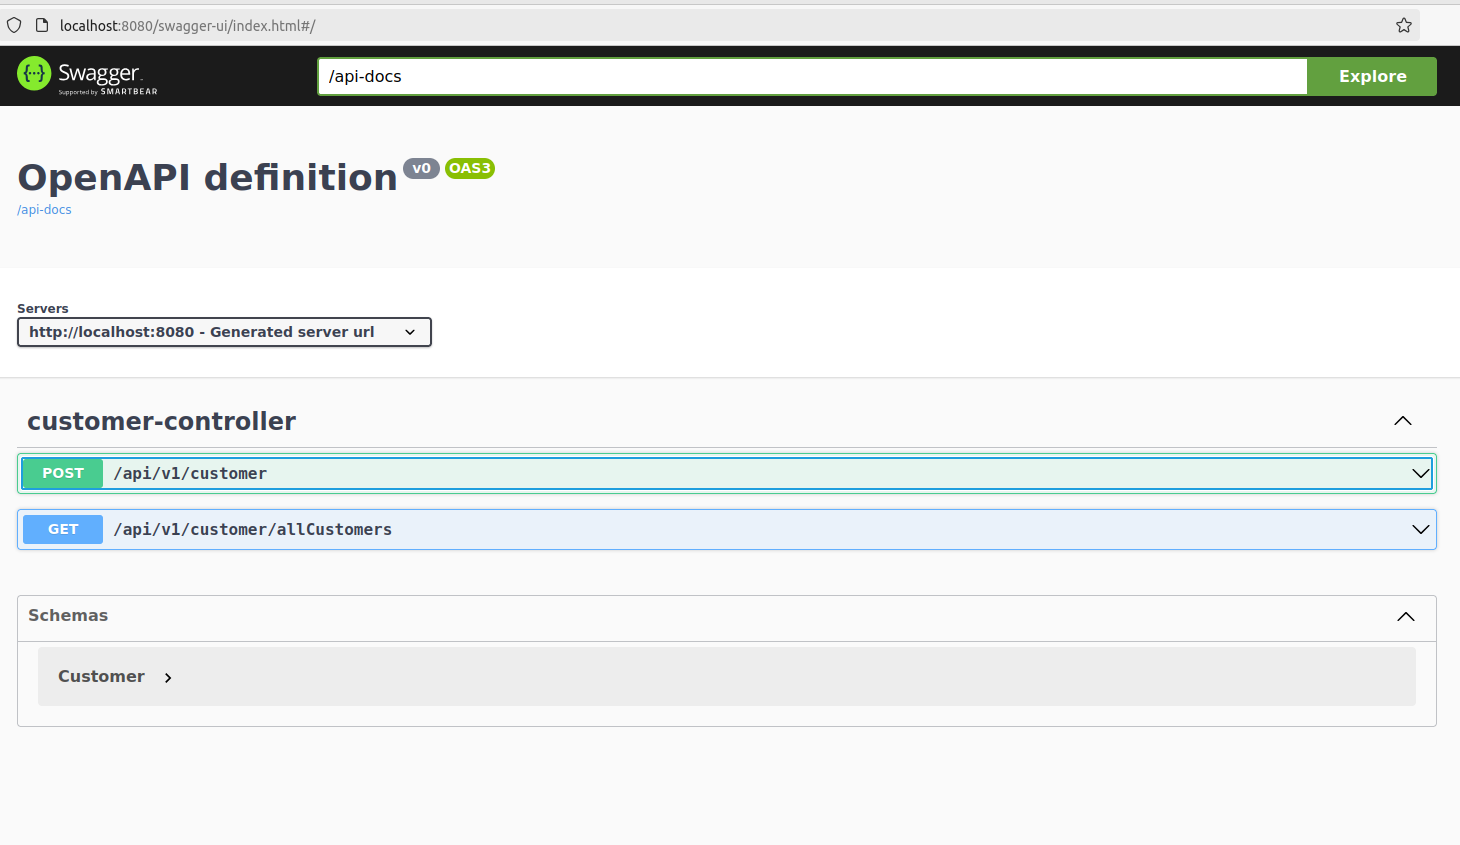
Swagger is an open-source set of tools for designing, building, documenting, and consuming RESTful web services. It provides a standardized way to describe APIs using JSON or YAML, making it easier for both humans and machines to understand the capabilities of a service without accessing its source code.
Key Components
- Swagger Specification: A format for describing RESTful APIs.
- Swagger UI: A web-based UI for exploring and testing APIs.
- Swagger Codegen: A tool for generating client libraries and server stubs.
Benefits
- Improves
APIdocumentation - Enables interactive API exploration
- Facilitates API-first development
- Supports automatic code generation
- Enhances collaboration between frontend and backend teams
Can be easily integrated with various frameworks, including Spring Boot, through libraries like SpringFox or SpringDoc OpenAPI.
Usage
- Define
APIspecifications - Generate interactive documentation
- Test
APIendpoints directly from the UI - Generate client SDKs or server stubs
Swagger (now part of the OpenAPI Initiative) has become a de facto standard for RESTful API documentation and development.
5.2 Maven Dependency
Add the SpringDoc OpenAPI dependency to your pom.xml (for Maven):
5.3 Configure in Spring Boot
Configure SpringDoc OpenAPI in your application.properties or application.yml:
5.4 Annotate (optional)
Annotate your REST controllers and methods with OpenAPI annotations to provide more details:
import io.swagger.v3.oas.annotations.Operation;
import io.swagger.v3.oas.annotations.Parameter;
import io.swagger.v3.oas.annotations.responses.ApiResponse;
import io.swagger.v3.oas.annotations.tags.Tag;
@RestController
@RequestMapping("/api")
@Tag(name = "Example API", description = "API for example operations")
public class ExampleController {
@GetMapping("/hello")
@Operation(summary = "Say hello", description = "Returns a greeting message")
@ApiResponse(responseCode = "200", description = "Successful response")
public String hello(@Parameter(description = "Name to greet")
@RequestParam(required = false) String name) {
return "Hello, " + (name != null ? name : "World") + "!";
}
}5.5 Open url browser
Run your Spring Boot application and access the Swagger UI at:
http://localhost:8080/swagger-ui.html
Understanding ResponseEntity in Spring
6 ResponseEntity
ResponseEntity is a class in Spring Framework that represents the entire HTTP response. It allows you to control the following aspects of the HTTP response:
- Status code
- Headers
- Body
6.1 Key Features
- Flexibility: You can customize every part of the
HTTPresponse. - Type Safety: It uses generics to ensure type safety of the response body.
- Convenience Methods: It provides static methods for quickly creating responses.
In Java Spring Boot, when you use ResponseEntity<>() with just the name of a class, it’s typically referred to as a “parameterized type” or “generic type.”
More specifically, this syntax is using a generic type parameter. The class name inside the angle brackets <> specifies the type of data that the ResponseEntity will contain.
For example:
This declares a ResponseEntity that will contain a User object.
This declares a ResponseEntity that will contain a List of Product objects.
The use of these parameterized types allows for type safety and helps the compiler ensure that you’re working with the correct types of objects when you’re handling the response.
6.2 Basic Usage

Here’s a simple example of how to use ResponseEntity:
6.3 Advanced Usage
You can set custom status codes, headers, and body:
6.4 Useful Links
6.5 When to Use ResponseEntity
Use ResponseEntity when you need fine-grained control over the HTTP response, such as:
- Setting custom status codes
- Adding or modifying response headers
- Conditionally returning different status codes based on some logic
- Creating responses with no body (like for DELETE operations)
By using ResponseEntity, you can create more flexible and powerful RESTful APIs in your Spring applications.
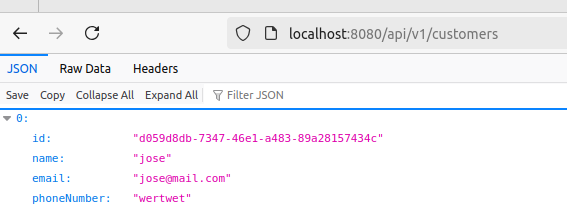
6.6 CustomerController
import org.springframework.http.HttpStatus;
import org.springframework.http.ResponseEntity;
import org.springframework.web.bind.annotation.*;
import io.swagger.annotations.*;
@RestController
@RequestMapping("/api/customers")
@Api(value = "Customer Management System",
description = "Operations pertaining to customers in the Customer Management System")
public class CustomerController {
private final CustomerService customerService;
public CustomerController(CustomerService customerService) {
this.customerService = customerService;
}
@ApiOperation(value = "View a list of available customers", response = List.class)
@ApiResponses(value = {
@ApiResponse(code = 200, message = "Successfully retrieved list"),
@ApiResponse(code = 404, message = "The resource you were trying to reach is not found")
})
@GetMapping("/allCustomers")
public ResponseEntity<List<Customer>> getAllCustomers() {
List<Customer> customers = customerService.getAllCustomers();
return new ResponseEntity<>(customers, HttpStatus.OK);
}
@ApiOperation(value = "Add a new customer")
@PostMapping
public ResponseEntity<Customer> createCustomer(
@ApiParam(value = "Customer object store in database table",
required = true)
@RequestBody Customer customer) {
Customer createdCustomer = customerService.createCustomer(customer);
return new ResponseEntity<>(createdCustomer, HttpStatus.CREATED);
}
@ApiOperation(value = "Get a customer by Id")
@GetMapping("/{id}")
public ResponseEntity<Customer> getCustomerById(
@ApiParam(value = "Customer id from which customer object will retrieve",
required = true)
@PathVariable String id) {
Customer customer = customerService.getCustomerById(id);
return customer != null
? new ResponseEntity<>(customer, HttpStatus.OK)
: new ResponseEntity<>(HttpStatus.NOT_FOUND);
}
@ApiOperation(value = "Update a customer")
@PutMapping("/{id}")
public ResponseEntity<Customer> updateCustomer(
@ApiParam(value = "ID of the customer to be updated", required = true)
@PathVariable String id,
@ApiParam(value = "Updated customer object", required = true)
@RequestBody Customer customerDetails) {
Customer updatedCustomer = customerService.updateCustomer(id, customerDetails);
return updatedCustomer != null
? new ResponseEntity<>(updatedCustomer, HttpStatus.OK)
: new ResponseEntity<>(HttpStatus.NOT_FOUND);
}
@ApiOperation(value = "Delete a customer")
@DeleteMapping("/{id}")
public ResponseEntity<Void> deleteCustomer(
@ApiParam(value = "Customer Id from which customer
object will be deleted from database table",
required = true)
@PathVariable String id) {
customerService.deleteCustomer(id);
return new ResponseEntity<>(HttpStatus.NO_CONTENT);
}
}7 Service and Repository
7.1 CustomerService interface and implementation
Why Use
Interfacesfor Services in Spring Boot? Because usinginterfacesfor services in Spring Boot is a best practice that offers several advantages fromLoose Couplingto having a clear contract.
Loose Coupling
Interfaces promote loose coupling between components. The code that depends on the service only knows about the interface, not the implementation. This makes it easier to change the implementation without affecting the rest of the application.
Easier Testing
Interfaces facilitate easier unit testing through mocking. You can create mock implementations of the interface for testing purposes, allowing you to isolate the component under test.
Multiple Implementations
Interfaces allow for multiple implementations of the same service. This is useful when you need different implementations for different scenarios (e.g., production vs. testing, or different business logic for different clients).
Dependency Injection
Spring's dependency injection works well with interfaces. You can easily switch implementations by changing the configuration, without modifying the code that uses the service.
Clear Contract
Interfaces serve as a clear contract for what operations a service provides. This improves code readability and helps in understanding the system’s architecture.
Aspect-Oriented Programming (AOP)
Spring’s AOP features work more smoothly with interfaces, allowing you to add cross-cutting concerns like logging or transaction management more easily.
Design by Contract
Interfaces encourage “design by contract” principles, where you define what a service does rather than how it does it, leading to more robust and maintainable code.
7.1.1 CustomerService
package dev.example.restaurantManager.service;
import dev.example.restaurantManager.model.Customer;
import java.util.List;
public interface CustomerService {
List<Customer> getAllCustomers();
Customer createCustomer(Customer customer);
Customer getCustomerById(String id);
Customer updateCustomer(String id, Customer customerDetails);
boolean deleteCustomer(String id);
long countCustomers();
}By using this interface, you define a clear contract for customer-related operations.
7.2 Two impplementations
Two very different implementations of the CustomerService interface:
- One will be a standard implementation using a database,
- and the other will be an in-memory implementation for testing or prototyping purposes.
7.2.1 Implementation 1: Database-backed CustomerService
package dev.example.restaurantManager.service;
import dev.example.restaurantManager.model.Customer;
import dev.example.restaurantManager.repository.CustomerRepository;
import org.springframework.beans.factory.annotation.Autowired;
import org.springframework.stereotype.Service;
import java.util.List;
import java.util.Optional;
@Service
public class DatabaseCustomerService implements CustomerService {
@Autowired
private CustomerRepository customerRepository;
@Override
public List<Customer> getAllCustomers() {
return customerRepository.findAll();
}
@Override
public Customer createCustomer(Customer customer) {
return customerRepository.save(customer);
}
@Override
public Customer getCustomerById(String id) {
Optional<Customer> customer = customerRepository.findById(id);
return
customer.orElseThrow(() -> new RuntimeException("Customer not found"));
}
@Override
public Customer updateCustomer(String id, Customer customerDetails) {
Customer customer = getCustomerById(id);
customer.setName(customerDetails.getName());
customer.setEmail(customerDetails.getEmail());
// Update other fields as necessary
return customerRepository.save(customer);
}
@Override
public boolean deleteCustomer(String id) {
if (customerRepository.existsById(id)) {
customerRepository.deleteById(id);
return true;
}
return false;
}
}7.2.2 Implementation 2: In-Memory CustomerService
package dev.example.restaurantManager.service;
import dev.example.restaurantManager.model.Customer;
import org.springframework.stereotype.Service;
import java.util.*;
import java.util.concurrent.ConcurrentHashMap;
import java.util.stream.Collectors;
@Service
public class InMemoryCustomerService implements CustomerService {
private final Map<String, Customer> customerStore = new ConcurrentHashMap<>();
@Override
public List<Customer> getAllCustomers() {
return new ArrayList<>(customerStore.values());
}
@Override
public Customer createCustomer(Customer customer) {
String id = UUID.randomUUID().toString();
customer.setId(id);
customerStore.put(id, customer);
return customer;
}
@Override
public Customer getCustomerById(String id) {
Customer customer = customerStore.get(id);
if (customer == null) {
throw new RuntimeException("Customer not found");
}
return customer;
}
@Override
public Customer updateCustomer(String id, Customer customerDetails) {
if (!customerStore.containsKey(id)) {
throw new RuntimeException("Customer not found");
}
customerDetails.setId(id);
customerStore.put(id, customerDetails);
return customerDetails;
}
@Override
public boolean deleteCustomer(String id) {
return customerStore.remove(id) != null;
}
// Additional methods for demonstration
public List<Customer> searchCustomersByName(String name) {
return customerStore.values().stream()
.filter(customer -> customer.getName().toLowerCase().contains(name.toLowerCase()))
.collect(Collectors.toList());
}
public void clearAllCustomers() {
customerStore.clear();
}
}These two implementations showcase different approaches:
DatabaseCustomerService: This implementation uses a
CustomerRepository, likely backed by a database. It’s suitable for production environments where data persistence is required.InMemoryCustomerService: This implementation stores customers in a
ConcurrentHashMap. It’s useful for testing, prototyping, or scenarios where a lightweight, non-persistent solution is needed.
Both implementations adhere to the CustomerService interface, demonstrating how the same contract can be fulfilled in very different ways. This flexibility is one of the key advantages of using interfaces in Spring Boot services.
8 JPA Query Methods
Spring Boot and JPA offer several ways to create queries. Here are the four most relevant methods:
- JPA Derived Query Methods
- @Query Annotation
- EntityManager with JPQL
- Native SQL Queries
8.1 1. JPA Derived Query Methods
Spring Data JPA can automatically create queries based on method names in your repository interface.
8.2 2. @Query Annotation
You can use the @Query annotation to define custom JPQL queries.
8.3 3. EntityManager with JPQL
For more complex queries, you can use the EntityManager directly with JPQL.
@PersistenceContext
private EntityManager entityManager;
public List<User> findUsersByAgeRange(int minAge, int maxAge) {
String jpql = "SELECT u FROM User u WHERE u.age BETWEEN :minAge AND :maxAge";
return entityManager.createQuery(jpql, User.class)
.setParameter("minAge", minAge)
.setParameter("maxAge", maxAge)
.getResultList();
}8.4 4. Native SQL Queries
When you need to use database-specific features, you can write native SQL queries.
8.5 JPQL (Java Persistence Query Language)
JPQL (Java Persistence Query Language) is an object-oriented query language used to define queries for entities and their relationships in JPA (Java Persistence API). It’s similar to SQL but operates on JPA entity objects rather than database tables.
Key Characteristics of JPQL
- Object-Oriented: Works with Java objects and their properties, not database tables and columns.
- Database-Independent: Queries can work across different database systems without modification.
- Supports JPA Relationships: Can easily navigate entity relationships.
- Powerful: Supports complex operations like joins, aggregations, and subqueries.
8.5.1 JPQL vs SQL
Here’s a comparison between JPQL and SQL:
| Aspect | JPQL | SQL |
|---|---|---|
| Operates on | Entity objects | Database tables |
| Case sensitivity | Case-sensitive | Generally case-insensitive |
| Portability | Database-independent | May contain database-specific syntax |
| Join syntax | Simplified using relationships | Requires explicit join conditions |
JPQL Syntax Examples
- Basic Select Query:
- Join Query:
- Aggregate Function:
- Subquery:
Using JPQL
- With
@Queryannotation:
- With
EntityManager:
Benefits of JPQL
- Type-safety: Works with Java types, reducing runtime errors.
- Abstraction: Shields developers from database-specific details.
- Optimization: JPA providers can optimize JPQL queries for better performance.
- Flexibility: Allows for complex queries while maintaining database independence.
8.5.2 Additional Resources
JPQL
- JPQL - Java Persistence Query Language
- JPA Query Language
- JPQL Reference
- Spring Data JPA - Query Creation
JPA Queries
For more information on Spring Boot JPA query methods, check out these resources:
9 JUnit 5 tests
10 DevOps
10.1 Creating a executable .jar
The command mvn clean package is a Maven command that performs two main phases of the Maven build lifecycle:
clean: This phase removes the target directory and any compiled files from previous builds. It essentially “cleans” your project’s working directory.package: This phase compiles your source code, runs tests, and packages the compiled code into a distributable format, such as a JAR file.
When you run mvn clean package, Maven will:
- Delete the
targetdirectory (clean) - Compile the source code
- Run unit tests
- Package the compiled code into a JAR/WAR file (depending on your project type)
This command is commonly used to ensure a fresh build of your project, starting from a clean state. It’s useful when you want to create a new package of your application, especially before deploying or sharing your code.
10.2 Working on different environments
Spring Profiles provide a way to segregate parts of your application configuration and make it be available only in certain environments. Any @Component, @Configuration or @ConfigurationProperties can be marked with @Profile to limit when it is loaded, as shown in the following example:
import org.springframework.context.annotation.Configuration;
import org.springframework.context.annotation.Profile;
@Configuration(proxyBeanMethods = false)
@Profile("production")
public class ProductionConfiguration {
// ...
}10.2.1 application.properties
You can use aspring.profiles.active Environment property to specify which profiles are active, for example, you could include it in your application.properties, as shown in the following example:
spring.profiles.active=prod
#---
spring.config.activate.on-profile=prod
spring.profiles.active=metrics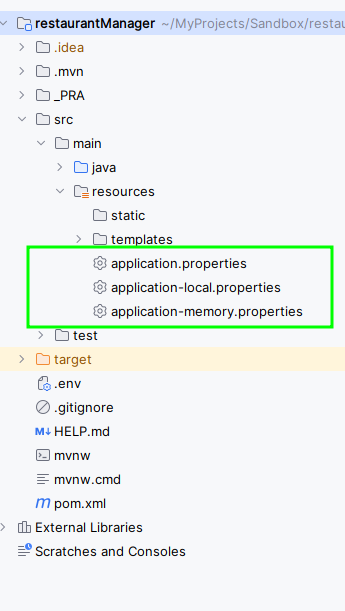
In RestaurantManger we have three application.properties docs:
- Default profile (
application.properties) - In-memory profile (
application-memory.properties) - Local profile (
application-local.properties)
These profiles allow you to run your application in different environments with specific configurations.
Default Profile (application.properties)
This is the base configuration file that sets up common properties for all profiles:
- Sets the application name to “restaurantManager”
- Activates the “local” profile by default
- Configures H2 database and JPA settings
- Sets up Swagger documentation paths
- Imports environment variables from a .env file
- Configures an endpoint URL for customers
spring.application.name=restaurantManager
# application.properties
spring.profiles.active=local
# H2 DATABASE SERVER
spring.datasource.driverClassName=org.h2.Driver
spring.jpa.database-platform=org.hibernate.dialect.H2Dialect
spring.h2.console.enabled=true
# DDL OPTIONS: create-drop, create, update, none, validate
#spring.jpa.hibernate.ddl-auto=create-drop
# SWAGGER
springdoc.api-docs.path=/api-docs
springdoc.swagger-ui.path=/swagger-ui.html
# ENDPOINTS
# Import .env file
spring.config.import=optional:file:.env
# import from environment variables
endpoint.url.customers=${ENDPOINT_URL_CUSTOMERS}
#endpoint.url.customers=/api/v1/customers/
# Enable debug logging
#logging.level.org.springframework=DEBUG
#logging.level.dev.example.restaurantManager=DEBUG
In-Memory Profile (application-memory.properties)
This profile is designed for running the application with an in-memory H2 database:
- Configures the H2 database to run in-memory
- Sets database username and password
- Uses “create-drop” as the DDL auto option, which is suitable for testing as it recreates the schema each time the application starts
# H2 IN MEMORY
spring.datasource.url=jdbc:h2:mem:testdb
spring.datasource.username=sa
spring.datasource.password=


# DDL OPTIONS: create-drop, create, update, none, validate
spring.jpa.hibernate.ddl-auto=create-drop
# create ? Hibernate first drops existing tables and then creates new tables.
# create-drop ? similar to create, with the addition that
# Hibernate will drop the database after all operations are completed;
# typically used for unit testing
#https://albertprofe.dev/springboot/sblab0-5.html#ddl
Local Profile (application-local.properties)
This profile is for running the application with a local H2 database file:
- Configures the H2 database to use a file-based storage
- Sets database username and password
- Uses “update” as the DDL auto option, which updates the schema without dropping existing tables
# H2 LOCAL DB SERVER
spring.datasource.url=jdbc:h2:/home/albert/MyProjects/DataBase/customerdb
spring.datasource.username=albert
spring.datasource.password=1234

# DDL OPTIONS: create-drop, create, update, none, validate
spring.jpa.hibernate.ddl-auto=update
# create ? Hibernate first drops existing tables and then creates new tables.
# update ? The object model created based on the mappings
# (annotations or XML) is compared with the existing schema,
# and then Hibernate updates the schema according to the diff.
# It never deletes the existing tables or columns
# even if they are no longer required by the application.
# https://albertprofe.dev/springboot/sblab0-5.html#ddl
10.2.1.1 How to Use These Profiles
Default Behavior: By default, the application will use the “local” profile as specified in
application.properties:Switching Profiles: To use a different profile, you can:
Change the
spring.profiles.activeproperty inapplication.properties.Set it as a command-line argument:
java -jar your-app.jar --spring.profiles.active=memorySet it as an environment variable:
export SPRING_PROFILES_ACTIVE=memory
Profile-Specific Properties: Spring Boot will load properties from
application.propertiesand then override/add properties from the active profile-specific file (e.g.,application-memory.propertiesorapplication-local.properties).
This setup allows you to easily switch between running your application with an in-memory database (useful for testing) and a local file-based database (useful for development or production) without changing your code. It also provides a flexible way to manage different configurations for various environments.
10.2.1.2 Precedence
When a property like spring.jpa.hibernate.ddl-auto is defined in both application.properties and a profile-specific properties file (e.g., application-dev.properties), the value from the active profile will override the one in application.properties.
Therefore, if the profile is active and specifies ddl-auto=create, it will take precedence over ddl-auto=update in application.properties.
The order of execution is determined by the active profiles and their precedence over the default properties.
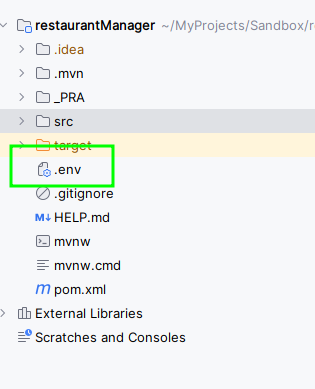
10.3 .env
The process loading environment variables from a .env file into application.properties, and then using those variables in your Spring Boot application works like this:
Loading from
.envfile: In yourapplication.properties, you have the following line:This instructs
Spring Bootto import variables from a.envfile if it exists. The “optional:” prefix means the application won’t fail if the file is missing.Defining the property: In
application.properties, you have:This sets the
endpoint.url.customersproperty to the value of theENDPOINT_URL_CUSTOMERSenvironment variable.Using the property in the controller: In CustomerController, we’re injecting this property:
This injects the value of
endpoint.url.customersinto theendpointUrlCustomersvariable.Accessing the property: In
showEndpointCustomers()method, we’re returning the value ofendpointUrlCustomers.
Here’s how it all comes together:
- When the application starts, it looks for a
.envfile and loads any variables defined there. - The
ENDPOINT_URL_CUSTOMERSvariable from.env(or from the system environment if not in.env) is used to set theendpoint.url.customersproperty in application.properties. Spring Bootinjects this property value into the controller.- The
controllercan now use this value, as demonstrated in theshowEndpointCustomers()method.
This approach allows to keep sensitive or critical environment-specific information (like API endpoints, passwords, users names, roles, etc) out of source code, making it easier to manage different configurations for various environments (development, staging, production, etc.).
10.3.0.1 IntelliJIdea IDE settings 2024
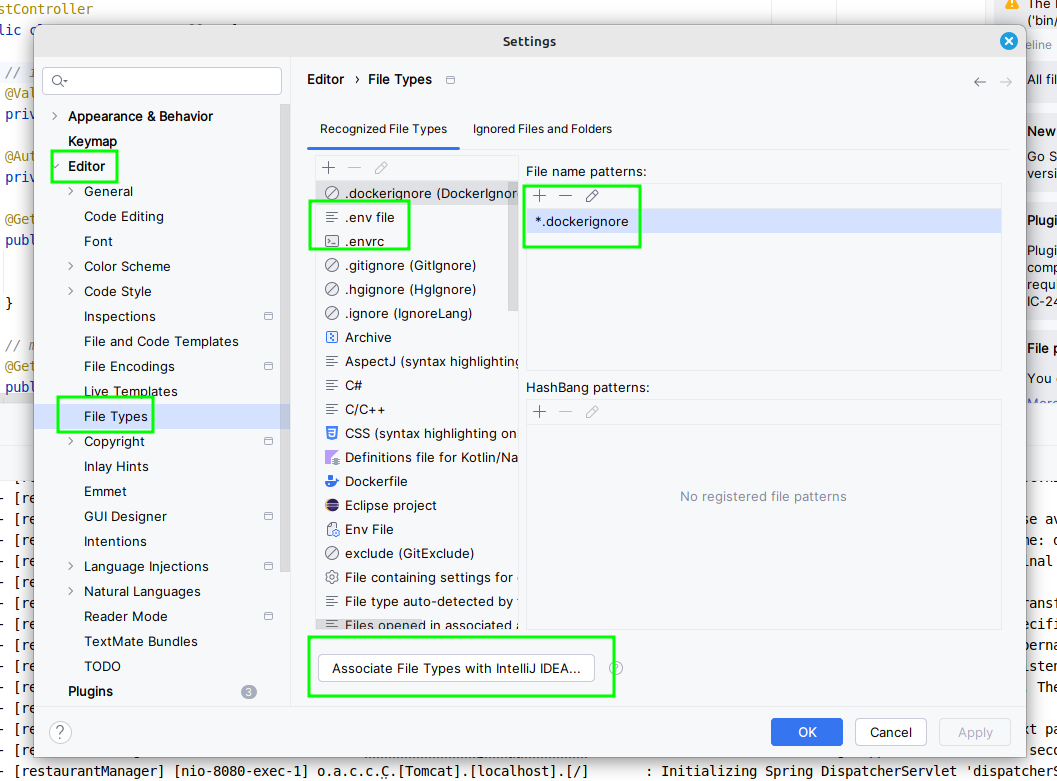
Check these settings at IntelliJIdea IDE:
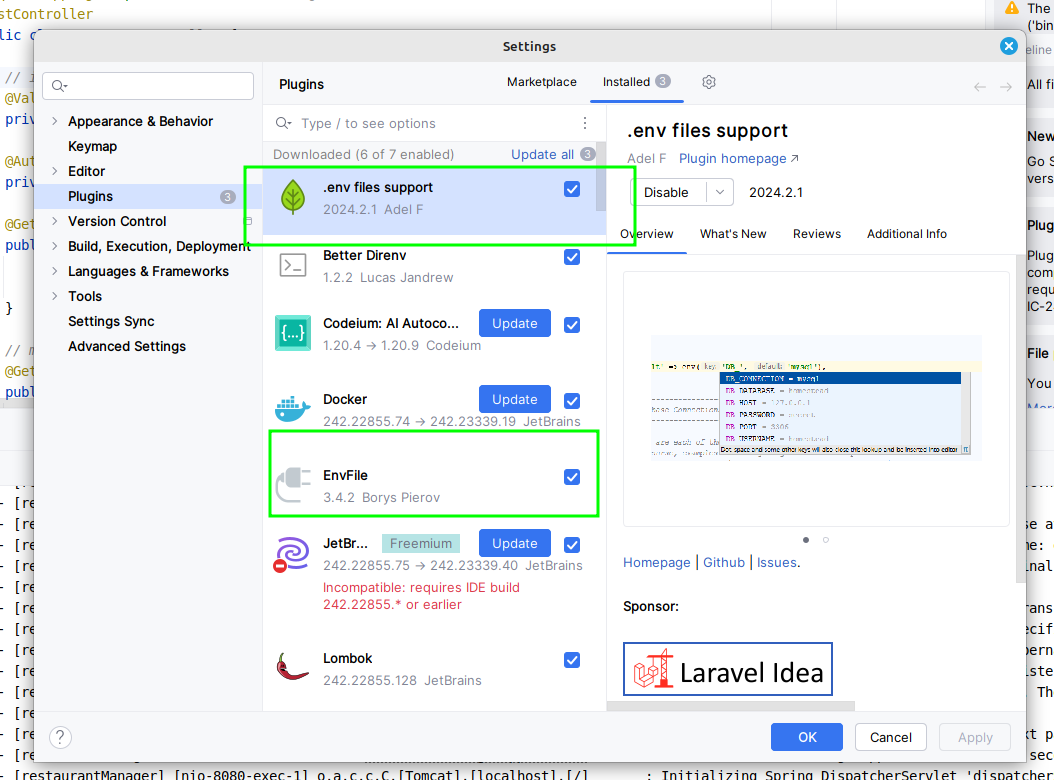
- Install the correct plugins: Make sure you have both the “EnvFile” and “.env files support” plugins installed16. These plugins provide better support for .env files in IntelliJ IDEA.
- Configure file type associations: Go to Settings | Editor | File Types and ensure that both *.env and .env patterns are assigned to the “DotEnv” file type3. This will help IntelliJ recognize the file correctly.
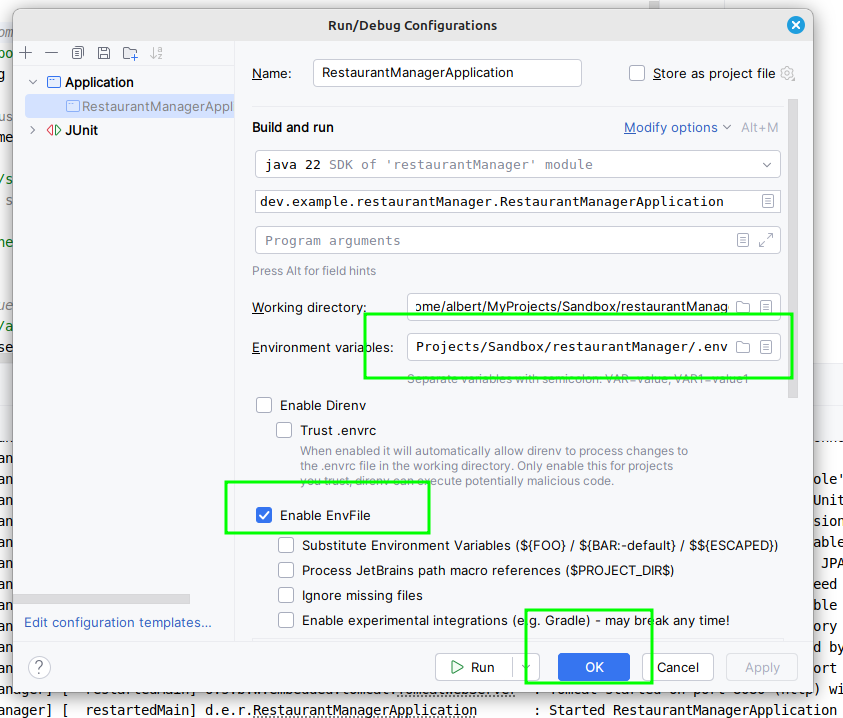
- Set up run configurations: For each run configuration where you need to use the .env file: Open Run | Edit Configurations
- Select your configuration: Go to the EnvFile tab
- Enable EnvFile support and add your .env file to the list
- Select directory .env
- Restart IntelliJ: After making these changes, restart IntelliJ IDEA to ensure all settings are applied correctly.
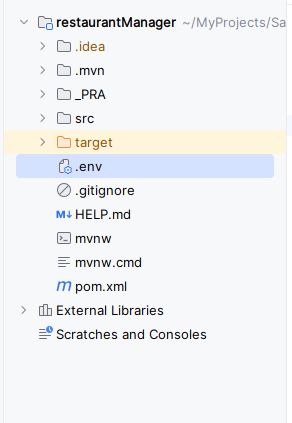
- Check file location: Ensure your .env file is in the correct location, typically the root of your project.
- Verify file content: Make sure your .env file is formatted correctly, with each variable on a new line in the format KEY=VALUE.
- Use absolute paths: If IntelliJ still can’t find your .env file, try using an absolute path in your run configuration
11 Code