Java MOOC Helsinki
Java Training
1 About the course
Welcome to the University of Helsinki’s free massive open online course (MOOC) on programming! This is an updated version of our popular course Object-Oriented Programming with Java.
During this course, you will learn the basics of computer programming, along with algorithms and object-oriented programming through the Java programming language. The course includes comprehensive materials and plenty of programming exercises - all of which are tested using our automatic testing service Test My Code.
2 Target
Anyone can join - no previous programming knowledge is required.
Unlike many programming courses found online, ours is completely unabridged; the course’s scope and material are identical to our CS1 Introduction to Programming and Advanced Programming courses.
This is the first course in our computer science learning track, and we use industry-grade tooling from day one. As such, the course is about programming in a real integrated development environment (IDE) instead of a browser or an educational IDE.
The course does not require separate registration. You can simply dive into the first part of the course found over here.
3 Course Contents
The course is split up into two individual courses:
- Java Programming I
- Java Programming II
Each course consists of seven parts, each with its own exercise set. Completing a single part takes approximately 5-20 hours, and we recommend reserving at least 10 hours per part, depending on prior skills with computers.
4 Helsinki’s (MOOC) on programming Java
Welcome to the University of Helsinki’s free massive open online course (MOOC) on programming! This is an updated version of our popular course Object-Oriented Programming with Java.
During this course, you will learn the basics of computer programming, along with algorithms and object-oriented programming through the Java programming language. The course includes comprehensive materials and plenty of programming exercises - all of which are tested using our automatic testing service Test My Code.
Materials
Test my Code - Cloud
IDE: NetBeans + TMC Plug-In
4.1 Create an account
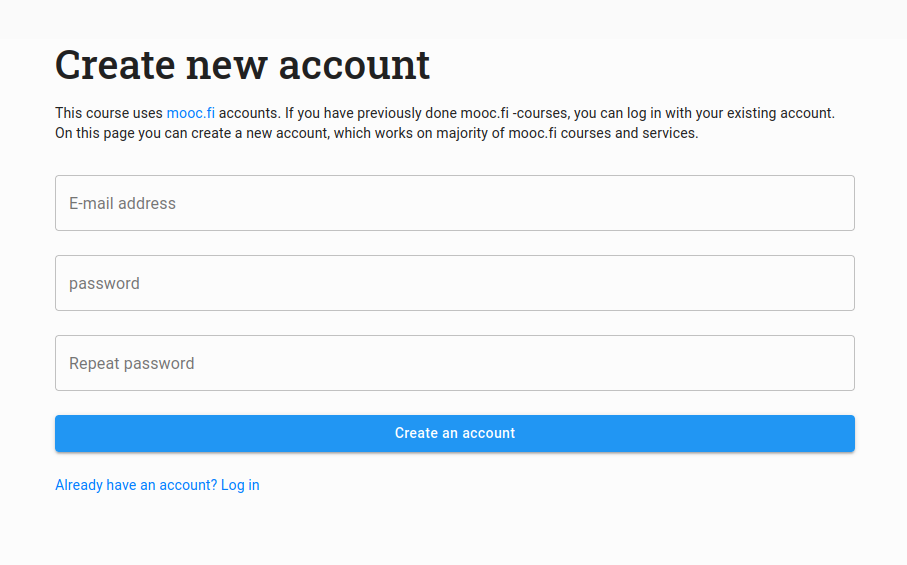
This course uses mooc.fi accounts. If you have previously done mooc.fi -courses, you can log in with your existing account. On this page you can create a new account, which works on majority of mooc.fi courses and services.
4.2 Log in to the development environment
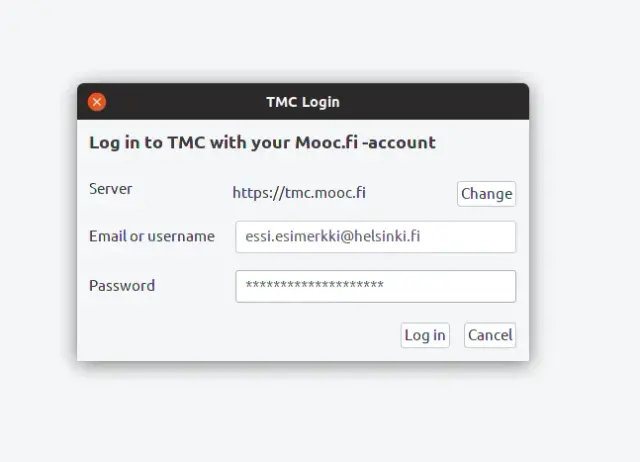
Start the TMCBeans development environment you installed. When the environment starts, it asks for your e-mail address and password. Use the details of your MOOC.fi account you created in the previous step.
4.3 Select your organization
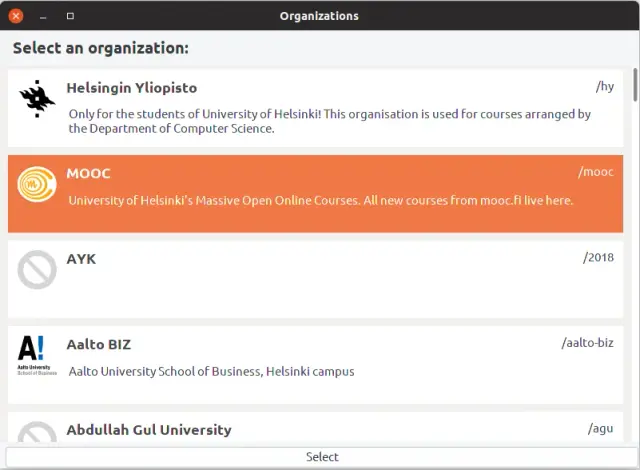
The development environment asks the organization you do the exercises for. Select the organization mentioned in the course material. For example the organization for “Programming MOOC 2020” the organization is “MOOC”.
4.4 Select your course
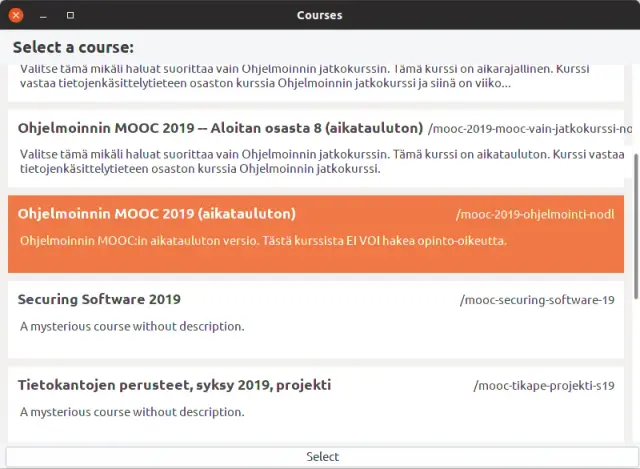
After this, select the correct course. The course name is mentioned in your course material. The courses you see listed here depend on your organization.
4.5 Doing your first coding exercise
Next we will go through step by step how you can complete the first exercise of “Programming MOOC 2020”. Even if you are doing another course, read the instructions to the end because they contain important information about the development environment.
Download the exercises
After you have logged in to the development environment and selected your organization and course, TMC will suggest exercises you can download (if there are any available). Download the exercises you want – the exercises have to do with the course material of the course you have selected.
Now you should have the exercises downloaded to the development environment.
You can see the exercises listed on the left. Select the Projects-tab, and a small circles indicating completed exercises appear.
4.6 Do an exercise
Open exercise Part01_01.AdaLovelace.
Double click the exercise, and look for a source code file called AdaLovelace.java.
Currently all source code files can be found from “Source Packages” directory in the exercise template.
You can open the exercise to the editor view by double clicking the file AdaLovelace.java. The editor view is the text editor at the middle of the TMC window, where you can make changes to the source code of a program.
Modify the source code so, that you see the following on your editor:
    public class AdaLovelace {
        public static void main(String[]args){
            System.out.println("Ada Lovelace :D");
        }
    }
4.7 Running the source code
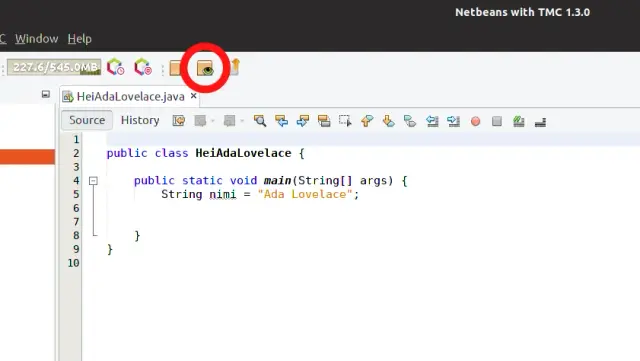
You can run the source code by clicking the Run button on TMC.
4.8 Testing the source code
Exercises often have automatic tests, which give you feedback on your solution.
You can run the tests by clicking the Test button on TMC.
4.9 Sending your solution to the server
Sending your solution to the server means submitting your exercise for grading. The exercises are almos always graded automatically, so you get your points (or a warning message) fast.
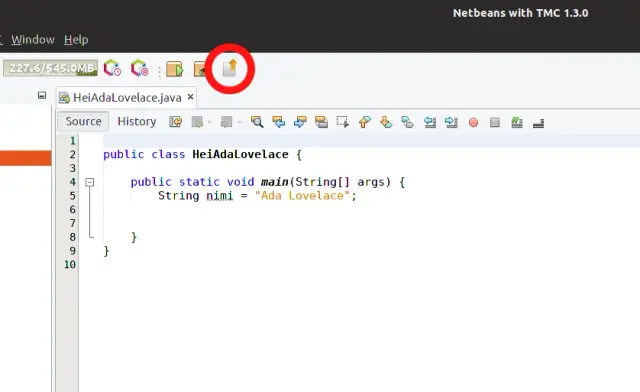
You can submit your solution either after all tests have passed, or separately by clicking the submit button on TMC.
You can check your points by logging in to tmc.mooc.fi Use your MOOC.fi account to log in to the service.
5 TMC in VisualCode
You need to installing TestMyCode Extension for VS Code:
You will need Java Extension Pack for Visual Studio Code to compile and run your Java code.
Start TestMyCode Extension by clicking TMC icon in the left bar, log in by clicking Log in button. Use the account you made in previous step to log in.
6 TMCBeans does NOT start
6.1 Windows
6.1.1 Step-by-step
- Go to
C:\ProgramFiles\TMCBeans\etc - Open tmcbeans.conf on any text editor
- Find jdkhome line and uncomment it by removing the “#” at the beggining of the line
- Add the path to your JDK on it - it could be
jdkhome="C:\Program Files\Zulu\zulu-11but your’s will be different
6.1.2 Screenshots
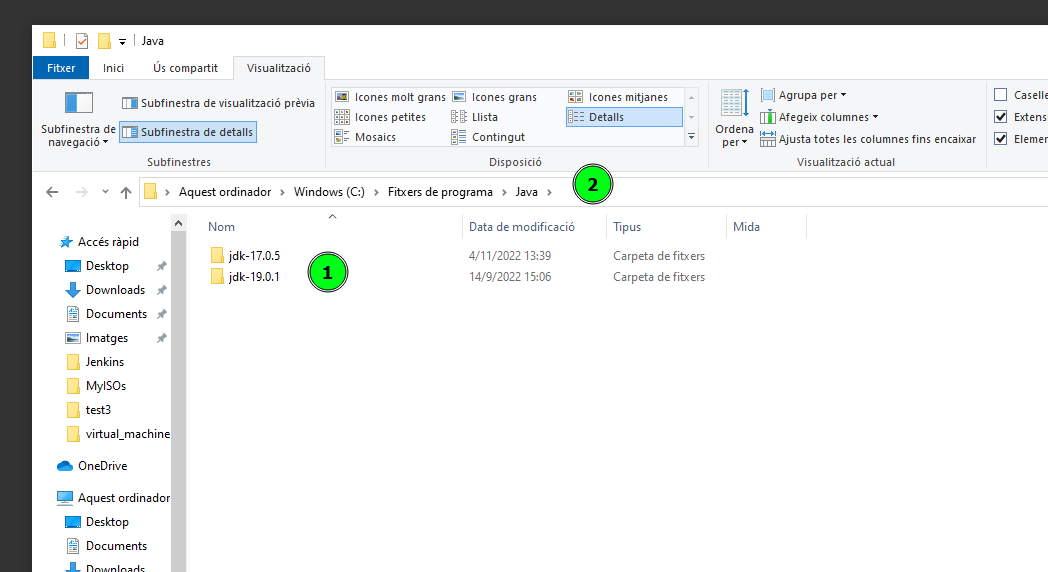
First at all localice all your JDK-JRE packages.
Remember that TMCBeans runs with JDK-11
TMCBeans does NOT run with JDK above 11
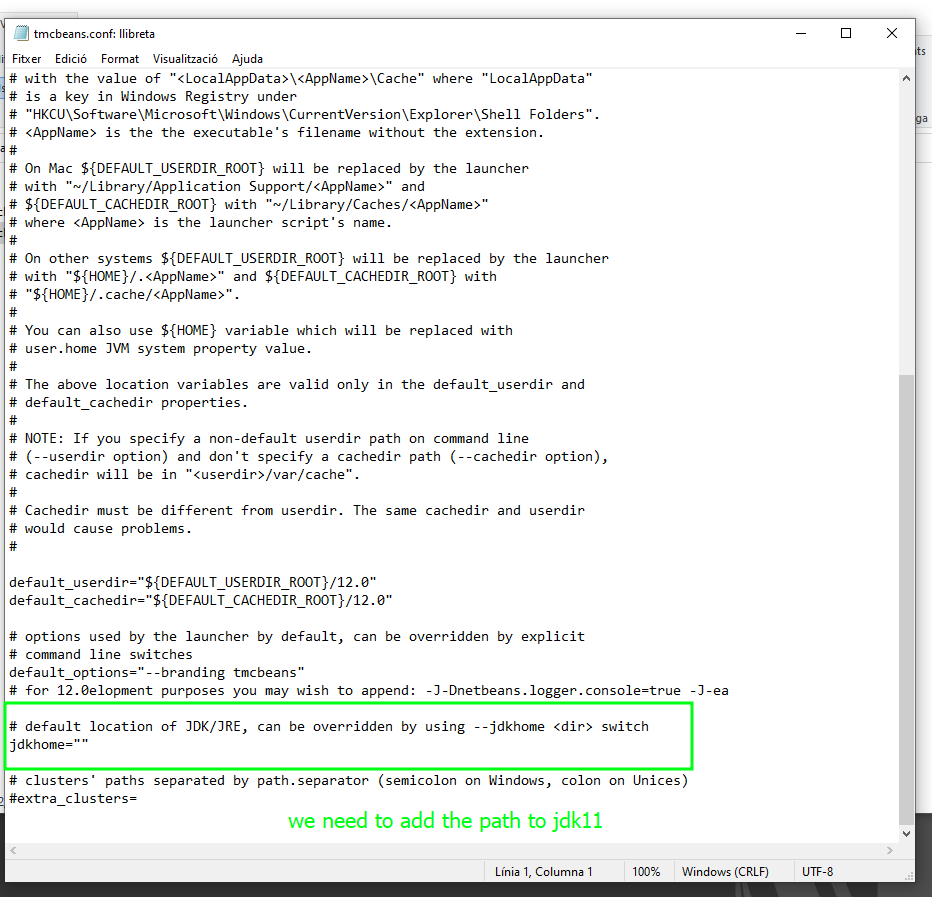
Open the file and modify the line where the TMCBeans execute JDK-JRE
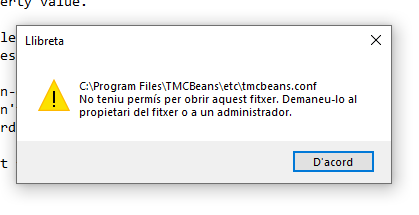
Be careful, in Windows you will need Administrator permission to save the configuration file.
7 Linux
For tmcbeans you must work with jdk8 or jdk11 in Linux, but never with higher ones. Therefore:
- Set up your system to 8:
Otherwise, it is a matter of local path java variables:
- Local Path Variable:
- Install JDK from
tar.gzwithin/optnot/user:
You may reset all installations
sudo apt-get autoremove openjdk #double tab to list all openjdk versions installed
sudo apt-get autoremove openjdk-11-jre #do this for all other openjdk versions
sudo apt-get purge openjdk*
sudo snap remove netbeans
sudo snap remove tmcbeans
sudo apt install openjdk-11-jre-headless
sudo apt install openjdk-11-jre
sudo snap install netbeans --classic
sudo snap install tmcbeans --classic
